


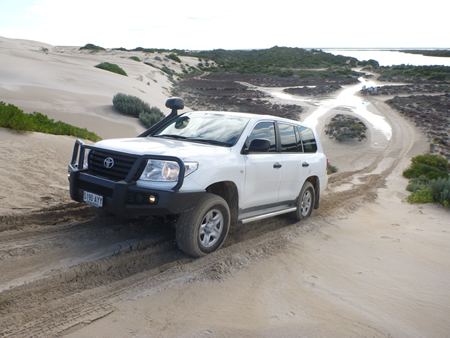
 South Australian Government in the delivery of its services in the Outback is now using the “poverty-pack” Toyota 200 Series wagon in increasing numbers. It’s a good wagon choice, bristling with driver safety electronics and 4WD systems that make it easy for drivers to stay out of trouble. However tyre fitment from the showroom floor leaves a lot to be desired, especially when you venture off the bitumen.
Standard 200 rubber is a Japanese Dunlop Grandtrek AT22, a ‘Passenger’ car (P) construction making it a breeze around the city but quick-wearing, flimsy and puncture-prone in the bush. The size is a little problematic too, because lots of old bushies will confirm that the wider the tyre, the more it becomes a ‘puncture-magnet’. Nothing we can do about that, because tyre and wheel sizes these days are regulated by manufacturers and legislators and deviating beyond a very narrow range of alternatives might bring trouble of a legal kind.
Let’s analyse the size and purpose:
285/65R17 116H = 285mm wide, with 65% aspect ratio (sidewall height), R = radial, fitted to a 17″ diameter wheel, with a 116 load index (1250kg carrying capacity per tyre) and H speed rated (210kph maximum speed)
 This is a high-speed tyre (designed to run to 210kph in a country where the usual maximum is 100kph and peaks in the NT at 130kph, it’s ridiculous) designed for an urban existence, with only 9mm of tread depth, with a modest carrying capacity (given the size and weight of the vehicle). If we take a look at who buys 4WDs these days it’s a sad fact that something like 90% of 4WD owners never go bush. Manufacturers knowing that statistic fit rubber better suited to the bitumen rather than the dirt. This means we other 10% of drivers in the commercial ‘real world’ of 4WD will need to seek out something more appropriate.
In the quest for greater durability and longevity the solution will be found in an alternative ‘Light Truck’ (LT) tyre, designed from the outset with a much tougher carcase (more on that below). Now in answer to which pattern should be selected I can say without a shadow of doubt that almost no South Australian Government vehicles will ever require the aggressive pattern of a ‘M/T’ or mud-terrain, but the alternative ‘A/T’ or all-terrain will be right.
An LT A/T will come with a tread pattern that is more open and designed to find grip on loose surfaces. That same tread will be around 13mm in depth, nearly 50% deeper than the standard tyre with a commensurate increase in tyre life. That means significantly better wear rates (i.e. takes longer to wear out) and importantly, much better value for money, for not only are they more durable, but often when you go shopping you’ll discover they’ll be cheaper than the original tyres fitted to the vehicle! Work that one out
The other important consideration with the LT A/T we’d mentioned was the carcase. The only true barometer of tyre strength is the load index. Put simply, the bigger the number the better. We’ve always recommended in the classroom that if you’re replacing tyres for a working 4WD, try and aim for a minimum 120 load index. On some vehicles that won’t be possible, but any increase is good if you intend spending time on the dirt. If we have a look at two tyre makers product lines that we have experience with in here at Adventure 4WD there’s a couple of alternatives that offer far better strength.
Bridgestone Desert Dueler D697 – LT285/65R17 120S – That’s a 120 load index = 1,400kgs and S speed rated = 180kph
Toyo OPAT2 – LT285/65R17 121S – That’s a 121 load index – 1,450kgs and S speed rated = 180kph
Both of these tyres are a more practicable application than the standard Dunlops, so we’ve now got a couple of alternatives to get us started for the bush.
Let’s turn our attention to the ‘nut behind the wheel’, the human interface and managing them correctly.
Consulting the ‘Tyre and Rim Association Manual of Australia’, the bible on tyres and used by both manufacturers, legislators and tyre resellers for determining wheel size, tyre size and pressure, we discover that the recommended on-road or highway minimum pressure for these LT alternatives starts at 250kPa or 36psi for a vehicle weighing up to 3,660kgs. Given that the GVM (gross vehicle mass) quoted by Toyota for the 200 series is 3,350kgs, we’ve got plenty in reserve at this pressure for the bitumen at speed.
So often this calculation is wrong on vehicles we see in here in the classroom, with tyre pressures set ridiculously and erroneously high. The placarded pressures will always be correct for the original tyres seen on the vehicle and should be adhered to. Over-inflating will only increase your risk of trouble with nervous steering, extended braking distances, greater puncture potential and premature wearing of the centres of the tyres, very much false economy if you’ve been guided to seek better fuel efficiencies (over-inflation is often recommended as a way to gain greater fuel economy because of reduced tyre friction/contact with the road surface alas it comes at a cost and with 4WD tyres costing $300+ each these days you’d have to gain a significant improvement in fuel use to offset the demise of your tyres, worn ahead of time).
Taking that 250kPa/36 psi starting point as being right for the bitumen, you’ll need to make some changes on the dirt and employ what we call ‘The 20% Rule’.
The 20% Rule = Reduce pressures by 20% & slow down by 20% on dirt!
If you were barrelling along at 100kph previously, now go no faster than 80kph and only if the road and conditions will support that speed. At the same time a pressure reduction to 200kPa/29psi will give the tyre greater flexibility to absorb impacts with rocks that ordinarily would destroy a tyre.
At day’s end and you return to the bitumen and the speed increases, you’ll need to re-inflate your tyres to their original highway pressure requirement. Do that and they won’t get hot and bothered, because the whole tyre management equation is all about maintaining an effective pressure/load/speed and temperature quotient.
Often you’ll hear the word ‘blowout’ in reference to a tyre failure at speed. This can be a dangerous situation, more likely to occur if you’re not practising our recommendations above. Typically this type of failure happens after a tyre has been compromised on the dirt, a sharp face of a rock or gravel penetrating the carcase/tread and starting a leak. The loss of pressure is determined by the size of the hole, the bigger the hole, the faster the tyre will go down. The penetration may have occurred fifteen minutes, an hour, a day or two previously, but gone unnoticed and with each subsequent minute with less and less pressure the tyre gets hotter and hotteruntil the sidewalls fail. That’s your blowout!
Some drivers can ‘feel’ that loss of pressure and safely pull up before the big event occurs and often with a tyre that’s repairable. Others press on, absorbed in the drive and the need to stay on schedule. A tyre that’s going down will have an effect on the steering, the handling around corners, even braking, it just won’t feel right and will prompt you to check.
Often drivers rely on a visual check, but that’s unlikely to tell what’s going on to all but the very experienced eye. A cheap way to manage temperatures and therefore failures is at every fatigue break you take, walk around the vehicle and put your palm on the top of each tyre and feel what the temperature is like. If one (or more) is substantially hotter than the others that should prompt you to get out a gauge and do a proper check of the remaining pressure, the gauge won’t lie.
There’s other ways of measuring the pressure. Today you can buy tyre pressure monitors that work by sending a radio signal from the wheels via each valve stem of a tyre’s current pressure, to a receiving unit in the car, affixed to the dashboard at easy glance. We’ve been using one in our work vehicle for over two years to really good results. All of these things are good in total loss prevention.
Catch the problem early enough and you won’t have as many dramas. You’ll still have to get the tyre repaired but it might not have caused a loss of control and likely rollover if you’re going too quickly. On the subject of repairs we’re often asked about the merit of ‘plugging’ a hole?
In a word… DON’T!
All too often we see tyres that have been plugged months after the repair was executed and you might say bravo, they really do work. Unfortunately they are only a temporary measure. Forget them at your peril. By plugging a tyre you’ve got no idea what the internal damage might be, nor whether the belt layers have delaminated. Get back on the highway at highway speed and bang!If you’re using them for a quick repair to get you to a service centre as soon as practicable then maybe it’s an immediate solution, but it’s not my preferred option. It’s far better to get involved with the management of your tyres as described above and prevents that puncture in the first place.
In the first instance get the right rubber, an LT is the best bet with the biggest load index you can get for that size. Then manage the pressures correctly, use the vehicle’s placard for the highway and use the 20% rule on the dirt, remembering to reinflate once back on the bitumen. Do these simple things and you can make yourself puncture-proof, we have.
*Footnote – Some might be surprised at the brands we’ve recommended above. In our use these makers products have proven durable on Aussie Outback gravel so we don’t have a problem recommending them. The brands that most often surface in magazines supposedly suited for the bush include Cooper, Mickey Thompson and BF Goodrich. In our experience they should be avoided as their rubber compounds are hard to meet their promise of big kilometres travelled before they’re worn out. What might be good on a USA concrete highway is no good in the Outback and these three will suffer tread chipping, tearing and degradation. Japanese rubber is usually more compliant.