gaming mouse under $50
There’s a lot of regulation in this country and at times too much lawmaking for lawmaking’s sake, but a recently observed change in the National Training Standard RIIVEH305D (now replaced by RIIVEH305E) where the use of snatch-straps as a viable recovery tool has been dropped, surprised me a little.
Retrieving a vehicle from a bogged situation from the front or rear has always been possible, provided you knew what you were doing and had the right gear. swiggy couponsA snatch-strap is an effective method, if you have a hero vehicle around to assist. Sadly history is littered with failures with these things, where users have paid scant regard to their own and others safety and death and injury has occurred.
You’ve likely seen it yourself, someone hooks a strap up to a tow-ball and pulls, only to see the ball break at its neck and cannon into the other vehicle, parting metal and glass like a bullet. Don’t want to be standing in the way of that one! Another scenario is a vehicle bogged deeper than the chassis line in thick mud and a strap is attached. This time the fixture is the tow point on the front of the vehicle. With a generous tug on the strap the immovable vehicle stays put and the tow point parts company from the vehicle, either shearing at a weld or breaking a bolt. Now I’ve used these points a million times in my working career and never once had a failure, but I’d never use it in a situation where the suction effect of the mud restrains the vehicle’s escape by adding an enormous load to the exercise as I’m suggesting here.
Demonstrations of the snatch-strap have been difficult in recent months as some of my clients don’t want it taught when the vehicles involved don’t have appropriate points. Fair call. In this risk averse world where plenty of folk are ready to point the finger and commonsense goes out the window, taking another smarter approach rubs out the potential for failure. So it is that that great Australian 4WD accessory house ARB recently released its range of bright red recovery points for bespoke fitment to new vehicles.
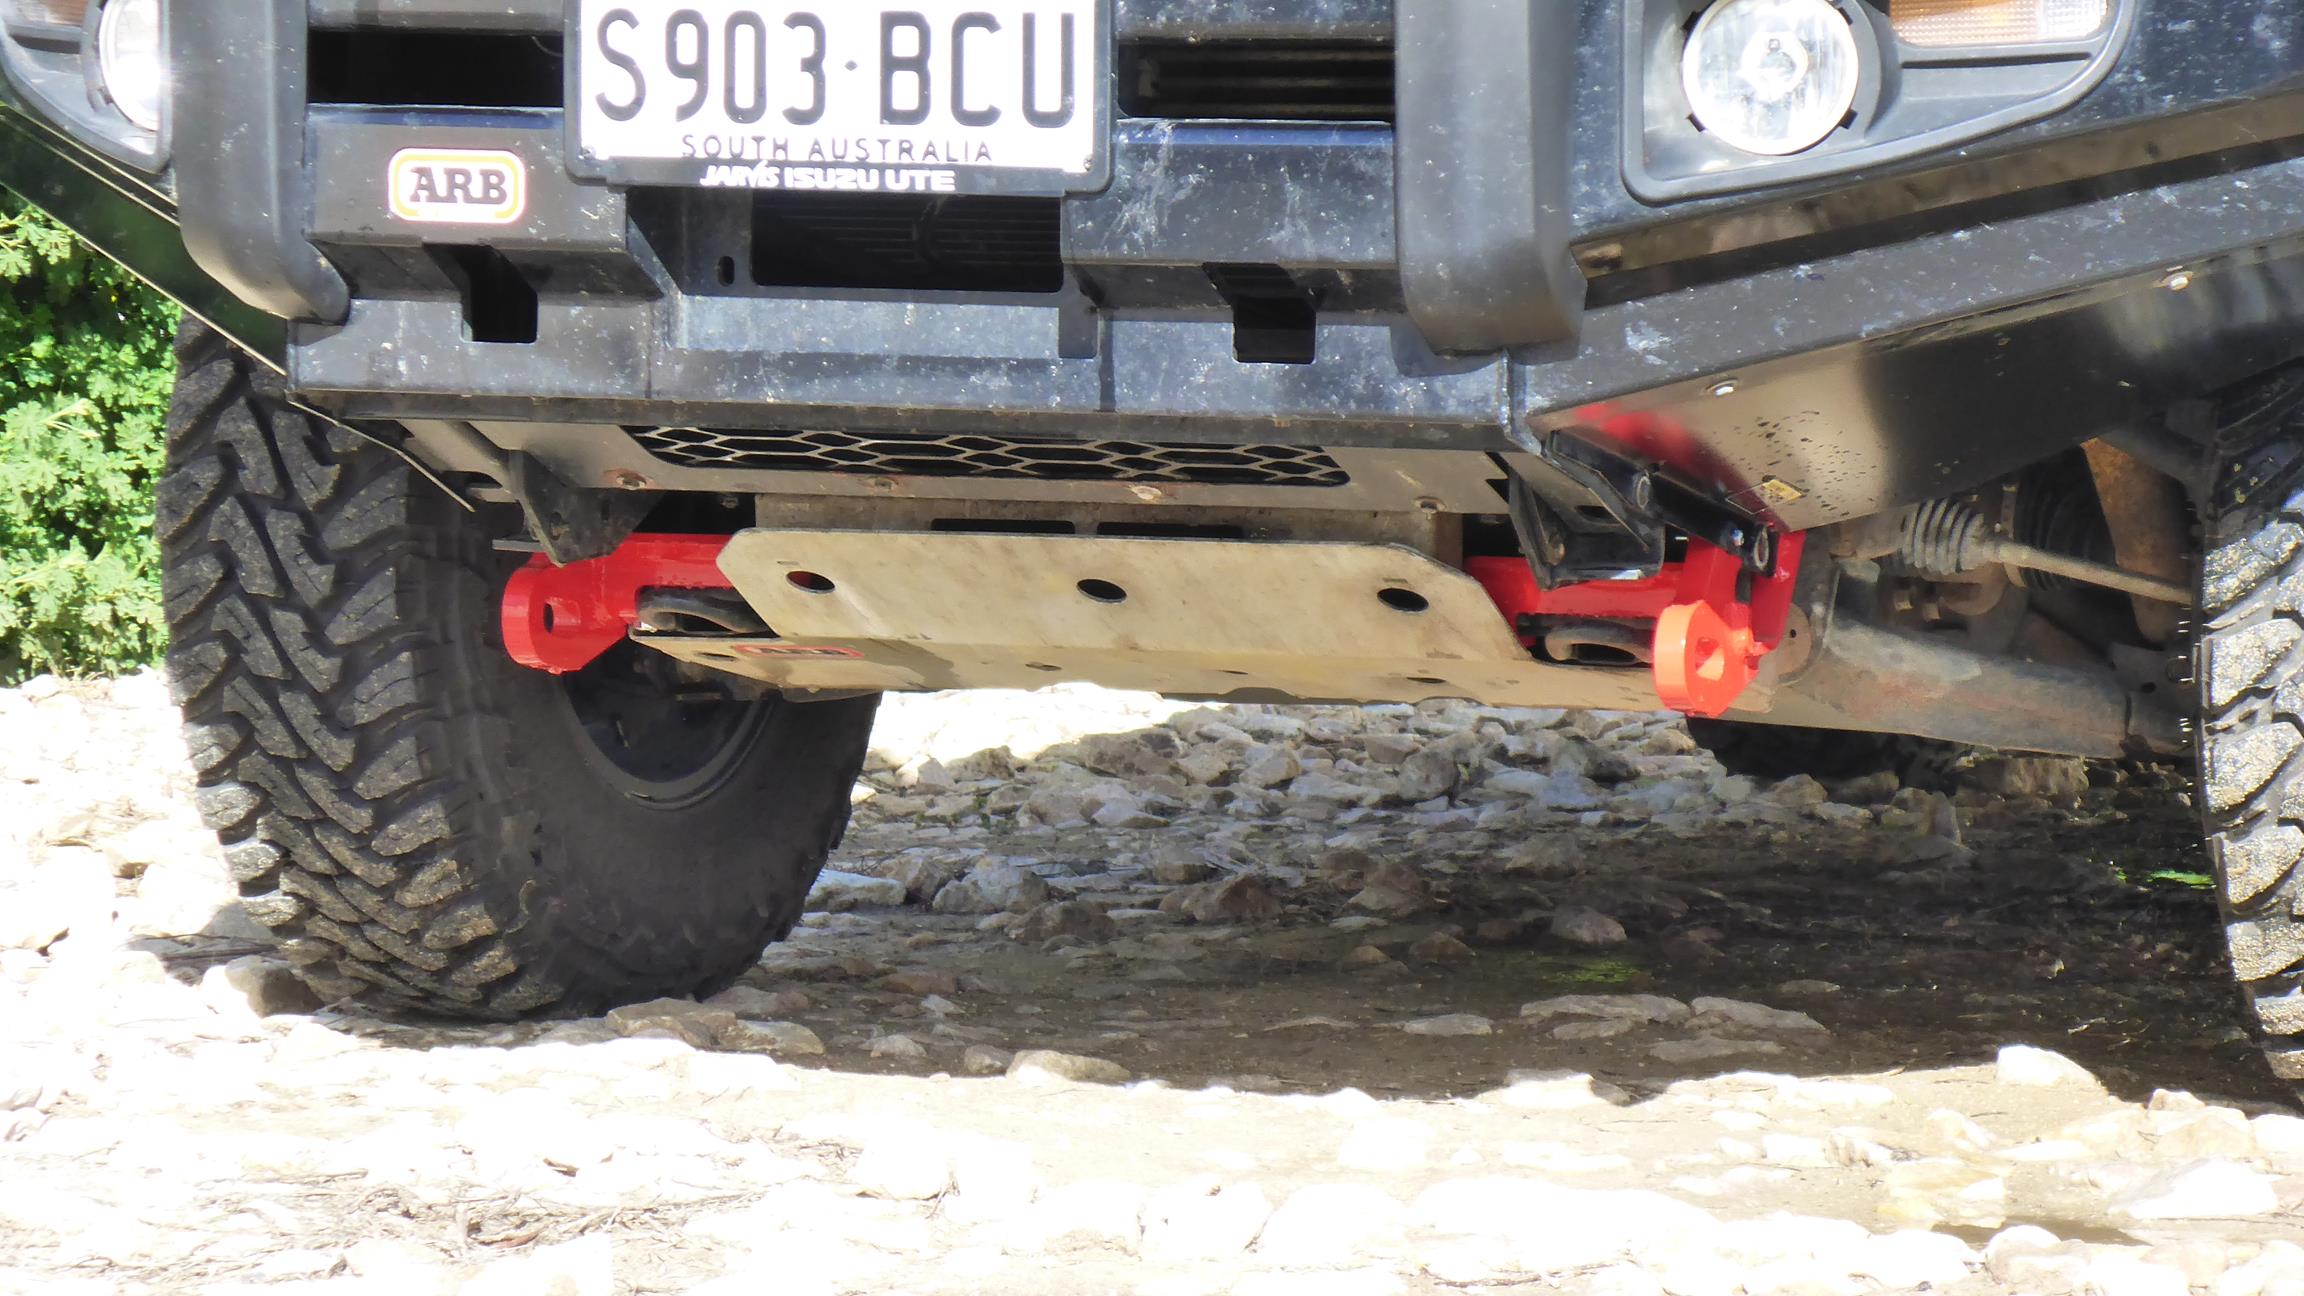
On our training DMAX we’ve opted for fitting a pair of them on the right and left hand chassis rails. As they’re designed for each individual vehicle make and model, they are not interchangeable, but they are compatible with ARB’s range of bullbars that you might have already fitted to your truck. That made fitment easy for us as the bar was dropped, the recovery points bolted on and the bar replaced, in the space of around 3 hours.
The finished result looks professional and sturdy and obvious!
In my humble opinion whilst the original Isuzu towing “eye” was satisfactory as a fixture for all but the very worst of situations, this ARB unit will cope with all. The point is tied to the chassis rail and triangulated at a number of points, so the chances of it coming off are just about non-existent. You can be confident this will last. Another feature that surprised me was that ARB state that the point can be used in an “off-centre” retrieval, something that in the past I would have tipped a bucket of water on very quickly.
Traditionally I’ve taught that a snatch-strap, or for that matter a winch cable, should only be used in an offset recovery by a maximum angle of around 20 degrees. That’s not much, as I always used to hammer home that the straightest pull is the best pull. On the ARB point it can take a side force up to the maximum steering angle of the front wheels, which could be as much as 45 degrees or more away from centre.
I can remember in the SE of South Australia having to retrieve a vehicle that had taken the plunge into a sand bowl in a coastal dunefield. Couldn’t go forwards or back, so sideways it had to go and with some gentle tugging with a strap on its towpoint, we got the nose around enough for the vehicle to drive out of its predicament. All the while we were effecting this remedy we were mindful that the towpoint wasn’t designed to do that, so having the ARB point certified to do so adds extra security in the field for similar predicaments.
One thing I did note with the included safety card provided was the set-up of the bow shackle to attach the strap to the point. Ordinarily I would always position the end loop of the strap on the flared or “bow” of the shackle and secure via the pin resting on the recovery point. My rationale is that the end loop of the strap can rotate in the bow to achieve its optimum load position without any end loop chafing. The distance between the threaded and plain eyes of the shackle is barely enough width for the end loop and on some I’ve used there’ll likely be a few threads visible that might cut the face of the strap material. Premature strap wear caused by improper fitment can and should be avoided.
The ARB supplied safety card recommends installing the end loop of the strap on the shackle pin between the shackle’s eyes and the bowed area of the shackle then slides to its load point, on the eye of the ARB recovery point. The exact opposite of what I’ve been teaching. I can see that method might be handy for a side-pull, allowing the strap and shackle to rotate freely in the direction it’s being pulled from, but in the dead-ahead I’m going to stick to my guns and allow the strap the freedom to settle along the radius of the bow without binding, as it would do if installed against the pin.
Despite the deletion from RIIVEH305E I think that if you’ve got yourself equipped with a pair of these you can confidently go ahead and retrieve in total confidence of the outcome, Nanny-State no more!
So what do I think of the ARB Recovery Point??? Well if it’s an ARB product you can always be sure of its engineering pedigree. This one’s no different. It’s a sturdy piece of kit, well braced and secured, so it makes a pretty essential addition to any owners 4WD vehicle if you’re intending to go bush. Price varies per fitment as each point is vehicle specific. Suggest you call your local ARB branch for advice.
PS Many thanks to our good friends at ARB Morphett Vale. Poor Durran had me postpone on him at least four times between January and June. As each date drew closer something got in the way… many thanks for the ever-helpful service and speedy turnaround. Phone Morphett Vale on 8186 6101, Regency Park on 8244 5001, or Elizabeth on 8252 1599


continue reading...
Reviews February 5, 2015
David Wilson
I reckon the single most-important accessory (apart from a reliable tyre pressure gauge) is an air compressor. Having the ability to raise and lower tyre pressures at will is incredibly important for a 4WD. You see a tyre’s life revolves around 3 simple premises, and they are the relationship between PRESSURE>LOAD>SPEED.
If you change one, you’ll need to change another to maintain an effective equilibrium and achieve the perfect 4WD result of either maintaining momentum, reducing the likelihood of getting bogged, reducing the potential for DraStic DS Emulator For PC punctures, carrying varying loads, maintaining steering control, and ensuring that suspension of yours keeps wheels planted on the ground.
Over the years we’ve had a succession of air compressors, some better than others at getting the job done. But what I can tell you is that none of them held a candle to the recently introduced ARB Twin Compressor… this thing is incredibly powerful and FAST!!!

Because of its construction (there’s two of everything in the kit) it has a large footprint. Finding a location to house it under a modern bonnet won’t bring you much joy. There’s simply too much clutter with an airbox, plumbing, ABS accumulator, fuel pump and lines, so depending on your vehicle you might be looking elsewhere. Perhaps under or behind a seat in a wagon or stowed away in the tub of a ute. That’s what we ended up doing in our DMAX, crafted a backing plate out of alloy chequerplate to mount the whole shebang on the LHS of the tub above the wheel-arch.

The unit looks mighty smart too with its trademark ARB anodised blue body. Bolted up on our backing plate along with its manifold storage tank and relay it looks the business and once the air line is hooked up its got a nice contrast in orange… just like the Adventure 4WD tangerine colour!
The unit has been designed for the rough and tumble, sealed for moisture and dust resistance and the wiring loom uses IP55 weatherproofing, wiring connections to exclude as much bad weather and slop you can throw at it (such is the life of a hard-working 4WD used in the bush). On top of that it’s been designed with heat in mind, because hot-running is the bane of any compressor. The mounting plate dissipates heat, the hard anodised cylinder bores make for reduced friction, the motors are internally thermal protected against extreme heat damage, the Teflon impregnated carbon fibre piston seals are designed for a trouble free life. This unit is over-engineered to buggery.
We’ve wired the unit with a mega power cable directly to the battery, the loom that came with it was good but for our purposes too short (going into the ute tub) so we’ve soldered in an extension to get the controls around to the RHS of the dash, the plan is to remove the driver’s cup-holder and replace it with a mounting bracket for the switchgear, three of them – compressor, air-locker and driving lights. The pump is fuse protected with a “maxi” blade in a holder, because under full noise it’s pulling 28A! Speaking of numbers it’ll punch out an impressive near 175 litres/minute under no load and only slightly less with 132 litres pouring through that hose when faced with a 200kPa/29psi backpressure to fight against.
Our air-locker goes in soon, but in the meantime we had to put those numbers to the test, just how long would it take to reinflate a tyre???
We grabbed the spare from the MAX, a 16″ Raptor wheel from our friends at CSA Alloys fitted with an LT265/75R16 D697. We pulled the valve core so it was dead-flat, replaced the core and fired up the compressor and hooked it on. First observation, it’s not that noisy but man it is fast! How about going from flat to a typical on-road pressure of near 35psi/240kPa in just 90 seconds!!!
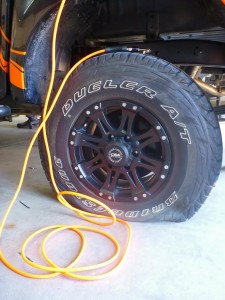
To put that into some perspective we compared it to one of our old-faithful Bushranger MAX-Air compressors, which when new were one of the fastest in the business. We’ve loved the performance of these with re-inflation duties in mind for our clients post-course. But hooked up to the valve the Bushranger took around 4 minutes to get to the same 35psi/240kPa value. In both instances we had the vehicle running, something you should do to give the compressor every bit of help in the power stakes.
So it’s fast, stylish and looks to be plenty durable, comes with full installation instructions and if you want to option it up for other duties there’s the aforementioned air-locker capability requiring manifold and relay with switch or a 4 litre alloy tank to get you some air in reserve if you’re running air tools and the like. Whilst we’ve opted for a permanent mount you can also get them in a box for portability between vehicles. Seems there’s a twin for every occasion!
Contact your local ARB store for pricing details or visit the web for fuller detail.
continue reading...
Over the 20 years we’ve been in business it’s been fascinating to see the evolution of the modern 4WD, some of it’s good, some on the face of it not so. Despite what the hard-core fraternity might think, the loss of live axles on a fourbie isn’t the end of the world. gbwhatsapp apkOn a ute for example, the combination of independent coil-over suspension in the front and a live axle with leaf springs in the rear, might not have the stretch you want, but electronics will give you the traction you’re lacking.
To address that loss of grip with even more finesse, many a 4WD maker have returned to the old ways with the addition of a rear-axle diff-lock operated by… you guessed it, electronics.
And so it is now with 4WD engagement. Plenty (read most) use electronics to move the power around the driveline and it can be a reliable system, provided you are patient. For example HIGH range 4WD can be engaged on the move at speeds up to 100kph (our preferred maximum dirt road speed however is 80kph) and with the right technique, hooks up seamlessly (see pics #2, #3 & #4). LOW range though has a procedure that requires a bit of attention on your part.
As plenty of 4WDs now run an automatic transmission you’ll need to get this right, so follow these simple steps:
- Bring the vehicle to a halt (we’re assuming you’re already on a loose surface).
- Analyse the track surface and determine that LOW range will be beneficial (usually if there’s steep or boggy conditions, LOW range will be hugely useful).
- Keeping your foot on the footbrake, shift the transmission lever into N (neutral)
- Grab your range selector dial and rotate it into the 4L position and then watch the dash display (see pics #1 & #5).
- You’ll observe a couple of things, firstly the display will change reflecting the movement from HIGH range to LOW and most will indicate “4L”. That confirms the selection has been successful (keep an ear out for an audible clunk too as the gears engage).
- With the confidence of LOW now ready to go kik for pc windows 8 , grab the gear selector and shift to D (drive), foot off the brake and onto the accelerator and you’re once more in motion! (see pic #6)
- If for some reason the display is flashing, something’s amiss! It might be that you’ve grabbed your D (drive) gear too early before the sequence was complete? Perhaps the vehicle was parked awkwardly and the wheels are mid-way through a change in direction? Ideally you should have everything lined up nice and straight, and with the engine running, 99.9% of the time changing into LOW should be a snap!
- You know how it is… if all else fails get the owners-manual out and have a read!!!
One other little note and that is it doesn’t matter whether your 4WD is a part-timer or a full-timer, if you’ve done with the rough and tumble and the bitumen is in sight, you need to get your vehicle back into either 2WD or its constant 4WD mode necessary for hard surfaces. If you don’t… ouch! You run the risk of some serious transmission damage = $$$

1.Isuzu Range Selector

2.Display 2WD

3.Display HIGH Range Selected
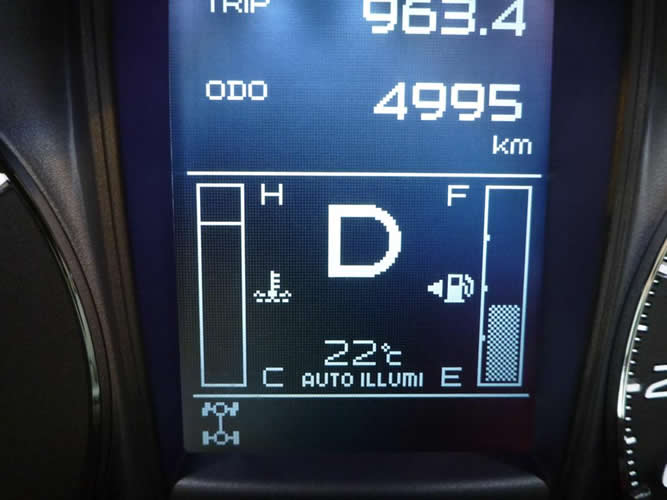
4.Display HIGH Range Engaged
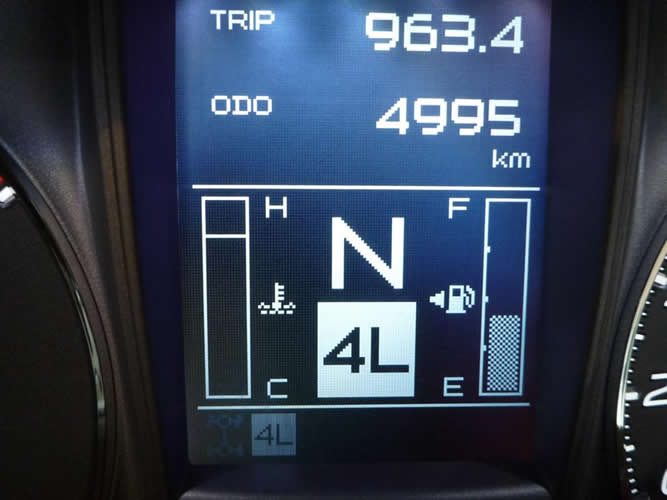
5.Display LOW Range Selected in Neutral
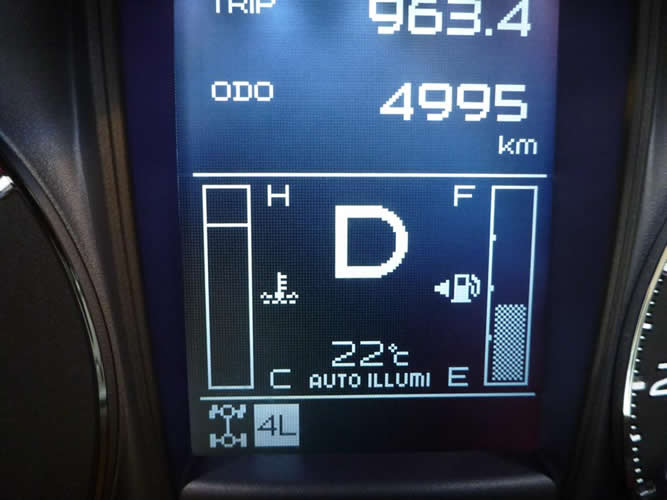
6. Display LOW Range Engaged
continue reading...
In June of 2013 we published in this BLOG our views on what should be done to enhance rider safety with ATVs with a 10 point message. It’s good reading and smart practice based on years of personal experience with the machines, on the farm and in the workplace and analysing the accident reports we see. If you scroll back through our posts you’ll find it. At that same time we also stated that we were against ROPS (Rollover Protection Systems). That opinion still stands for fixed or rigid applications, because if the bike goes over, that steel tube landing on you will likely do more damage than if it wasn’t there.
happy new year 2018 images
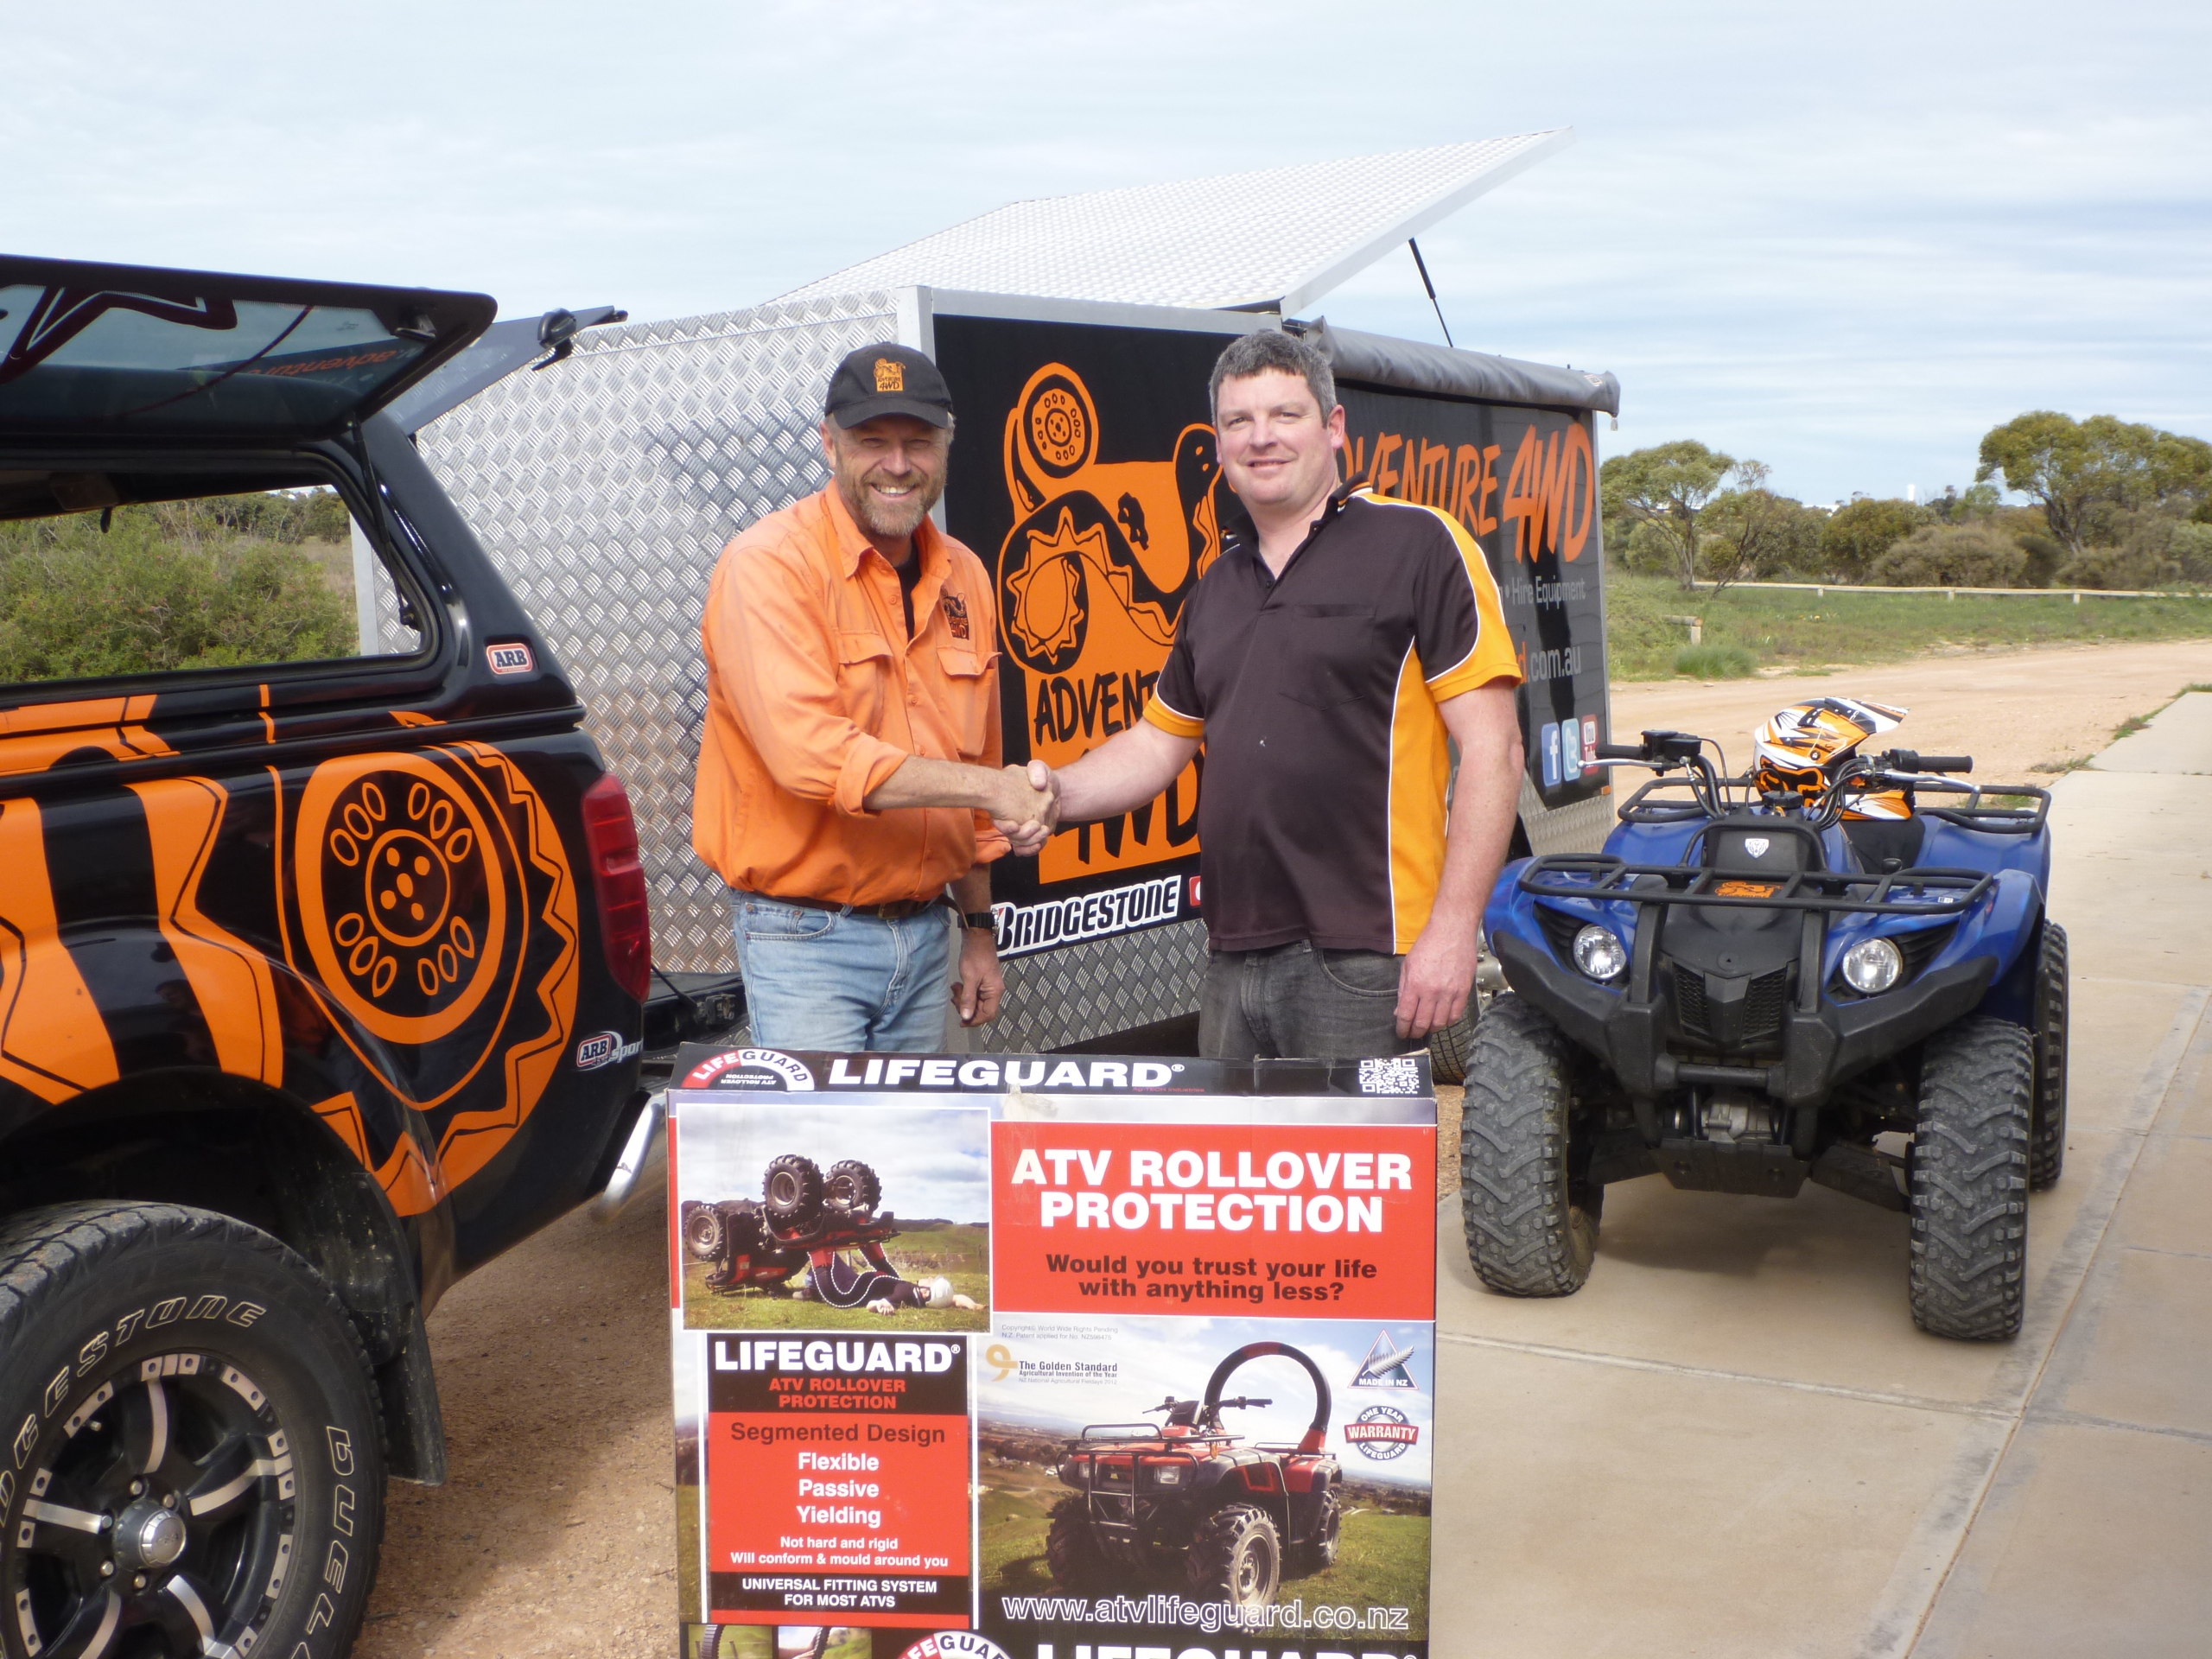
A much better way to approach the thorny issue of rollover protection is this brilliant Kiwi idea called the “ATV Lifeguard”, marketed in Australia by ATV goods supplier Topaz Global in WA. The Lifeguard is unique in that its safety “halo” is a segmented plastic vertebrae with a central tensioning rope (or its spinal core) that allows the Lifeguard flexibility if it were to land on you. Whereas a rigid tube will hurt, the Lifeguard will deform around your shape. Bruised you might be, crushed you wont!
It’s brilliant and fitted currently to one of our Yamaha 450 Grizzlys with an easy installation, it’s demonstrating to our many course attendees who ride the bike how safe things can be if only a bit of thought is put to the problem.
Craig from Topaz Global delivering our ATV Lifeguard
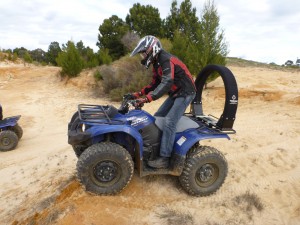
Lifeguard fitted to Grizzly, a smart package indeed!
continue reading...
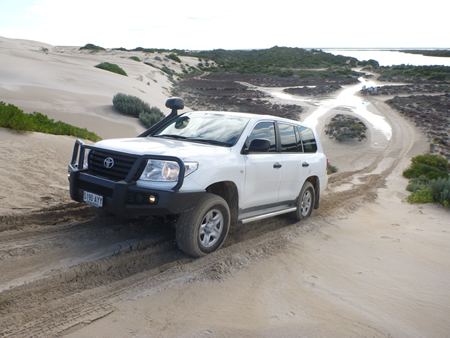 South Australian Government in the delivery of its services in the Outback is now using the “poverty-pack” Toyota 200 Series wagon in increasing numbers. It’s a good wagon choice, bristling with driver safety electronics and 4WD systems that make it easy for drivers to stay out of trouble. However tyre fitment from the showroom floor leaves a lot to be desired, especially when you venture off the bitumen.
Standard 200 rubber is a Japanese Dunlop Grandtrek AT22, a ‘Passenger’ car (P) construction making it a breeze around the city but quick-wearing, flimsy and puncture-prone in the bush. The size is a little problematic too, because lots of old bushies will confirm that the wider the tyre, the more it becomes a ‘puncture-magnet’. Nothing we can do about that, because tyre and wheel sizes these days are regulated by manufacturers and legislators and deviating beyond a very narrow range of alternatives might bring trouble of a legal kind.
Let’s analyse the size and purpose:
285/65R17 116H = 285mm wide, with 65% aspect ratio (sidewall height), R = radial, fitted to a 17″ diameter wheel, with a 116 load index (1250kg carrying capacity per tyre) and H speed rated (210kph maximum speed)
 This is a high-speed tyre (designed to run to 210kph in a country where the usual maximum is 100kph and peaks in the NT at 130kph, it’s ridiculous) designed for an urban existence, with only 9mm of tread depth, with a modest carrying capacity (given the size and weight of the vehicle). If we take a look at who buys 4WDs these days it’s a sad fact that something like 90% of 4WD owners never go bush. Manufacturers knowing that statistic fit rubber better suited to the bitumen rather than the dirt. This means we other 10% of drivers in the commercial ‘real world’ of 4WD will need to seek out something more appropriate.
In the quest for greater durability and longevity the solution will be found in an alternative ‘Light Truck’ (LT) tyre, designed from the outset with a much tougher carcase (more on that below). Now in answer to which pattern should be selected I can say without a shadow of doubt that almost no South Australian Government vehicles will ever require the aggressive pattern of a ‘M/T’ or mud-terrain, but the alternative ‘A/T’ or all-terrain will be right.
An LT A/T will come with a tread pattern that is more open and designed to find grip on loose surfaces. That same tread will be around 13mm in depth, nearly 50% deeper than the standard tyre with a commensurate increase in tyre life. That means significantly better wear rates (i.e. takes longer to wear out) and importantly, much better value for money, for not only are they more durable, but often when you go shopping you’ll discover they’ll be cheaper than the original tyres fitted to the vehicle! Work that one out
The other important consideration with the LT A/T we’d mentioned was the carcase. The only true barometer of tyre strength is the load index. Put simply, the bigger the number the better. We’ve always recommended in the classroom that if you’re replacing tyres for a working 4WD, try and aim for a minimum 120 load index. On some vehicles that won’t be possible, but any increase is good if you intend spending time on the dirt. If we have a look at two tyre makers product lines that we have experience with in here at Adventure 4WD there’s a couple of alternatives that offer far better strength.
Bridgestone Desert Dueler D697 – LT285/65R17 120S – That’s a 120 load index = 1,400kgs and S speed rated = 180kph
Toyo OPAT2 – LT285/65R17 121S – That’s a 121 load index – 1,450kgs and S speed rated = 180kph
Both of these tyres are a more practicable application than the standard Dunlops, so we’ve now got a couple of alternatives to get us started for the bush.
Let’s turn our attention to the ‘nut behind the wheel’, the human interface and managing them correctly.
Consulting the ‘Tyre and Rim Association Manual of Australia’, the bible on tyres and used by both manufacturers, legislators and tyre resellers for determining wheel size, tyre size and pressure, we discover that the recommended on-road or highway minimum pressure for these LT alternatives starts at 250kPa or 36psi for a vehicle weighing up to 3,660kgs. Given that the GVM (gross vehicle mass) quoted by Toyota for the 200 series is 3,350kgs, we’ve got plenty in reserve at this pressure for the bitumen at speed.
So often this calculation is wrong on vehicles we see in here in the classroom, with tyre pressures set ridiculously and erroneously high. The placarded pressures will always be correct for the original tyres seen on the vehicle and should be adhered to. Over-inflating will only increase your risk of trouble with nervous steering, extended braking distances, greater puncture potential and premature wearing of the centres of the tyres, very much false economy if you’ve been guided to seek better fuel efficiencies (over-inflation is often recommended as a way to gain greater fuel economy because of reduced tyre friction/contact with the road surface alas it comes at a cost and with 4WD tyres costing $300+ each these days you’d have to gain a significant improvement in fuel use to offset the demise of your tyres, worn ahead of time).
Taking that 250kPa/36 psi starting point as being right for the bitumen, you’ll need to make some changes on the dirt and employ what we call ‘The 20% Rule’.
The 20% Rule = Reduce pressures by 20% & slow down by 20% on dirt!
If you were barrelling along at 100kph previously, now go no faster than 80kph and only if the road and conditions will support that speed. At the same time a pressure reduction to 200kPa/29psi will give the tyre greater flexibility to absorb impacts with rocks that ordinarily would destroy a tyre.
At day’s end and you return to the bitumen and the speed increases, you’ll need to re-inflate your tyres to their original highway pressure requirement. Do that and they won’t get hot and bothered, because the whole tyre management equation is all about maintaining an effective pressure/load/speed and temperature quotient.
Often you’ll hear the word ‘blowout’ in reference to a tyre failure at speed. This can be a dangerous situation, more likely to occur if you’re not practising our recommendations above. Typically this type of failure happens after a tyre has been compromised on the dirt, a sharp face of a rock or gravel penetrating the carcase/tread and starting a leak. The loss of pressure is determined by the size of the hole, the bigger the hole, the faster the tyre will go down. The penetration may have occurred fifteen minutes, an hour, a day or two previously, but gone unnoticed and with each subsequent minute with less and less pressure the tyre gets hotter and hotteruntil the sidewalls fail. That’s your blowout!
Some drivers can ‘feel’ that loss of pressure and safely pull up before the big event occurs and often with a tyre that’s repairable. Others press on, absorbed in the drive and the need to stay on schedule. A tyre that’s going down will have an effect on the steering, the handling around corners, even braking, it just won’t feel right and will prompt you to check.
Often drivers rely on a visual check, but that’s unlikely to tell what’s going on to all but the very experienced eye. A cheap way to manage temperatures and therefore failures is at every fatigue break you take, walk around the vehicle and put your palm on the top of each tyre and feel what the temperature is like. If one (or more) is substantially hotter than the others that should prompt you to get out a gauge and do a proper check of the remaining pressure, the gauge won’t lie.
There’s other ways of measuring the pressure. Today you can buy tyre pressure monitors that work by sending a radio signal from the wheels via each valve stem of a tyre’s current pressure, to a receiving unit in the car, affixed to the dashboard at easy glance. We’ve been using one in our work vehicle for over two years to really good results. All of these things are good in total loss prevention.
Catch the problem early enough and you won’t have as many dramas. You’ll still have to get the tyre repaired but it might not have caused a loss of control and likely rollover if you’re going too quickly. On the subject of repairs we’re often asked about the merit of ‘plugging’ a hole?
In a word… DON’T!
All too often we see tyres that have been plugged months after the repair was executed and you might say bravo, they really do work. Unfortunately they are only a temporary measure. Forget them at your peril. By plugging a tyre you’ve got no idea what the internal damage might be, nor whether the belt layers have delaminated. Get back on the highway at highway speed and bang!If you’re using them for a quick repair to get you to a service centre as soon as practicable then maybe it’s an immediate solution, but it’s not my preferred option. It’s far better to get involved with the management of your tyres as described above and prevents that puncture in the first place.
In the first instance get the right rubber, an LT is the best bet with the biggest load index you can get for that size. Then manage the pressures correctly, use the vehicle’s placard for the highway and use the 20% rule on the dirt, remembering to reinflate once back on the bitumen. Do these simple things and you can make yourself puncture-proof, we have.
*Footnote – Some might be surprised at the brands we’ve recommended above. In our use these makers products have proven durable on Aussie Outback gravel so we don’t have a problem recommending them. The brands that most often surface in magazines supposedly suited for the bush include Cooper, Mickey Thompson and BF Goodrich. In our experience they should be avoided as their rubber compounds are hard to meet their promise of big kilometres travelled before they’re worn out. What might be good on a USA concrete highway is no good in the Outback and these three will suffer tread chipping, tearing and degradation. Japanese rubber is usually more compliant.
continue reading...