By David Wilson – First Published in Loaded 4X4 Magazine in 2019
Above: Meet Rick Whitworth, OKA owner and all-round clever guy!
Those folk in Western Australia have always been thinkers outside the box, a product of their distance from the east-coast centres of power and I reckon the product of a fair bit of “fuck-you”, since the State has been the engine room of the nation’s economy for decades. That same thinking has been the catalyst for the recent redistribution of GST revenues in this country, as it has always been a sore point that WA has been propping up other States who weren’t pulling their weight.
Above: One of the transport hubs of Iron Ore production in Western Australia, Port Hedland and a major driver of the Australian economy. PIC thanks to Pilbara Country
When iron ore mining was really starting to hit its straps in the early 80’s a consortium of miners got together to solve a problem that still exists today, the need for a vehicle with true 4WD capability and a three-tonne payload. We’ve all seen various adaptations of Toyota’s 70 series range evolve over the decades the vehicle has been in existence and it’s been used widely in mining in that time, but the payload is paltry, OK for the light jobs, not so hot for the intermediate.
Above: Toyota Land Cruiser 70 Series in all its iterations has been prominent in Australian mining, but it’s seriously underdone for payload for many operators who need to carry more stuff.
So, in downtown Bibra Lake an industrial estate in Perth, the OKA Australia motor vehicle brand was created. That was in 1986 and a prototype was drawn up with plans to create a simple platform to build a range of different vehicle types, single cab utes, dual-cab utes, buses, trucks and any evolution of that your mind might think of. With a simple body/chassis bolt-together philosophy using big Allen bolts to change the configuration of the vehicle to any one of its variants, you could change the vehicle in an afternoon and still be legal, no need for an engineering assessment and a clumsy re-registration process as the job’s been done!
Above: Western Australia has always been home to OKA, the original premises were at Bibra Lake and now in Fremantle where the latest Gen 5 trucks can be sourced. PIC thanks to OKA Australia.
Clients were obviously going to come from mining, but OKA also held out great hopes for military sales and of course there would be a trickle of recreational users too, to supplement the necessary volumes needed for mass production.
I remember seeing for the first time the founding model, the XT, at an event held in Adelaide just after the dealer network was created and it was an impressive beast. I reckon that was around 1993. The local distributor was a company called Alltrac and the shindig attracted plenty of SA Government interest with the Minister of Mines attending to do the ribbon-cutting for the new dealership.
Above: Rick’s XT OKA was number 149 in the cavalcade of builds back in the day.
A few OKAs then found their way into Government agencies who used to do remote areas work across the State, based on the premise of having a robust platform with a decent payload. My clients working with the Environment Department liked the machine as it afforded them much more comfortable digs when they were doing their field surveys, but they were not without their problems.
OKA fanciers have a spin on the model nomenclature that came out with each new edition and it goes likes this; OKA XT = extra trouble, OKA LT = less trouble and the last model OKA NT = no trouble! Apparently, the worst offenders were the last ones, so steer clear of an NT if it’s offered to you!
OKA’s fortunes waxed and waned as the years slipped by with a licensing partnership with Hindustan Motors in India in 1997 having plenty of potential except for the execution being crude. In my research for this story I found a link to a Hindustan RTV ambulance (one of the myriad body styles this project spawned) with a bunch of pictures, one a safety message warning amongst other things of “Brakes are soft and sensitive, avoid pressing brake pedal too hard.” Something got lost in translation there, but the RTV project ran aground in 2008 as the buses built on the OKA platform were supposedly prone to rollover. The nail in the coffin for that project came thanks to an Indian Department of Transport scientific paper commissioned after plenty of RTVs turned-turtle, killing and injuring passengers. The report was pretty damning with its findings. I wonder though how much thought went into investigating the skills and licensing requirements of the drivers involved? As they say, there are always two sides to every story.
Above: Plenty of OKAs became fire fighting kits. PIC thanks to OKA Australia
There were sales in New Guinea and an agency in Africa created, locations you’d think would be ideal for buyers of these robust-looking vehicles, but it was always struggle-street with only 500 vehicles built in its life and its reputation further challenged by an international scandal that involved a Malaysian partnership that turned sour. The scant reports I’ve read suggest a substantial misappropriation of funds, the disappearance of IP and production manuals and involvement of Malaysian Government officials suggesting corruption at some level.
For OKA lovers there is some recent news that a Fifth Generation platform has now been created with modern running gear and appointments and continues the rich tradition of this amazing vehicle. It now has some serious motivation running either a Cummins 6.7L (350HP) or 4.5L (205HP) turbo-diesels offering a 1,000Nm or 850Nm outputs and with Allison 6-speed automatic transmissions. They don’t come much tougher than that.
While OKA’s early history reads a bit like the best international espionage thriller and despite all the roadblocks put in its way, it still is a vehicle with a lot of supporters, one of their greatest is Rick Whitworth who hails from Melbourne.
Above: Rick at the wheel of his OKA camper.
Rick and his wife Sue planned for their retirement experience to be an international one, one that many of us can only dream about, pack the vehicle on a boat and transport it somewhere exotic and overland it near and far, so the vehicle had to be robust and reliable and able to be fixed anywhere.
OKA pretty much fitted that bill so in 2008 the hunt began for a suitable candidate. They wanted a bus body based on advice given by a few folk and that would make a camper set-up easy work, but the OKA body is made of steel and is heavy. A single cab with a body made of lighter weight composite materials and aluminium probably would have been a better starting point in hindsight to get the payload down.
Two early candidates were discounted, one a bus with brilliant mechanicals but a body full of concern and a cab-chassis that had OK mechanicals and no body and both priced towards the upper end of a basic used OKA. You can expect similar machines to cost between $20-40K and kitted out campers stretch to $100K or more depending on features, mechanicals and condition.
Luckily for the Whitworths (or depending on how you look at it when you consider the work and money tipped into this) in 2009 they got wind of an ex-tour bus that had fallen on hard times and was lying dormant in the snowfields of the NSW Alps. Daughter Nicky was working at Charlotte’s Pass and discovered the bus had been banished by NSW Roads because it was a little smoky! Her boyfriend of the time (a diesel mechanic) was of the opinion that the owners wanted it gone and a low-ball offer might just work.
Turns out the vehicle in its original life was used by a tour operator in Exmouth in WA, did a ton of work there before being bought by the Charlotte’s Pass operation to ferry skiers up and down the hills. When the Whitworth’s saw it, it had 500K on the clock. After purchase and a bit of detective work done, it was revealed it was really 1.5M K on the clock!!!
All that toil had taken its toll on the mechanicals and everything was shot, the gearbox, transfer case, the diffs and the motor. Incredibly though it was still driveable and with a deal done at a cheeky $10K, the Whitworth’s chugged off to Melbourne from the Alps and it was easy to see their progress as a smog alert was issued along their route. They were pulled up twice on the way home for the gargantuan amount of smoke coming out the back of the OKA, by the sounds of it good enough to hide a battleship in the North Atlantic!
Above: Perkins Phaser diesel engine and in its 30 year production run something like a half a million units were made for diverse uses like tractors and in this case, a flash RV!
It’s a testament to the Perkins Phaser diesel engine that it made the trip home and no doubt more than a few of the previous hundreds of thousands of kilometres before it, without turning up its toes. When the strip-down started Rick was of the opinion now was the time to get a new Perkins, replacing this 110 (that’s horsepower) variant with the more powerful 135 version. Nup, wasn’t going to happen, because the Perkins design of using a wet-liner cylinder sleeve in a block that miraculously was still perfect, meant the original 110 was going to keep earning its keep.
The 110 motor earns its keep (in legendary style) around the world in all sorts of vehicles, it’s a tractor motor and likely suffers huge neglect in its service with less than perfect owners, so imagine what life with the Whitworths might be with Mr Fastidious Rick at the helm? Perhaps 5M K???
With the decision made to re-sleeve and start from scratch with all the peripherals new or refurbished it was time to look at coaxing some more horsepower and doing it reliably.
Above: Rick has plenty of storage options, something you run out of quickly with your typical dual-cab setup.
Slow and steady might suit ploughing fields but it makes driving a chore on the highway so air, fuelling, exhaust and tuning had to be considered to fix the horsepower deficit. Fleetguard supply Cummins componentry and a new airbox was picked from their catalogue, an Opti Air 100 that features a bigger airbox and cylindrical air filter assembly with fewer restrictions, helping the OKA breather more easily.
A mate of a mate who could see some potential in increasing the size and type of the turbocharger got a batch purpose-built in China to their specification, a Garrett with wastegate and coupled to a matched intercooler. The intercooler has its own fan too, to belt through more air when the ambient temperature isn’t doing the job. The new Garrett price was a fraction of that quoted for repair of the old unit (try $750 Vs $3K), and it also meant that others could tap into this resource when the time came for their own overhauls.
With the exhaust taken care of better fuel metering was next and a set of Bosch injectors were installed along with a new fuel pump. All that fuel getting tipped in at precisely the right moment, at a cooler temperature than before and then igniting with plenty of ferocity, coupled to the newly boosted flows, meant the 110 once tuned was good for double the grunt it had when new in 1994.
Keeping the whole thing cool was a priority too as the likely destinations Rick and Sue intended visiting were going to be toasty at times, so the stock radiator was chucked out and replaced with a 4-core version that’ll never get unsettled, even in 50C temperatures!
When you up the ante on the horsepower that usually will impact further down the line, so some strengthening changes were required. The gearbox was replaced with a new Dana unit (the replacement cost cheaper than a rebuild) and now shifts sweet as a nut compared to the spoon in a bowl of porridge gear selection before and helped in no small part by ditching the original ceramic clutch and replacing it with an organic version. The transfer case was the original and rebuilt, as the New Process 205 used in earlier OKAs was much better than the Rockwell used in the last of the production. The Rockwell’s apparently consume a lot of power and are noisy buggers. Definitely don’t need that! Whilst the NP205 case was open, a 27-spline input shaft was installed, ditching the original 23-spline type.
Above: AVM free-wheeling hubs save a tiny bit of coin on the highway legs.
Rick had the good fortune of taking his differentials to a Melbourne specialist for the rebuild process and got invited to do some of the work under the watchful eye of a master craftsman. As Rick said to me in the interview, “I like to tinker and disassembly and reassembly is a skill easily acquired when you read any of the technical data pages on sites like Pirate 4X4. Got a Dana diff? There’ll be a tear-down story about them, the only issue when it comes to diffs is the accurate setting up and shimming and that is the job of a specialist who can do it with their eyes closed!” Some jobs were farmed out, whilst Rick did a lot of the less finicky work himself, which he found fascinating.
Both front and rear differentials are LSD types too and the axles needed beefing up too, now sporting 35 spline ends which are way more robust than the stock 32 spline versions. The front end also got heavier duty steering knuckles because the originals were a bit underdone.
Above: Many leaves make light work and dual-shock setup takes care of the thump on corrugated tracks.
The suspension has had its fair share of attention too and now works a treat. OKAs wore elliptical (leaf) spring sets front and rear and he’s added a heavier top spring for some extra carrying capacity and had them all reset. The problematic bushes in the eyes of the leaves were remanufactured from XT to NT specification, 16mm up to 20mm and now they’ll never break. Another upgrade was to mimic the NT’s twin shock arrangement and Rick fabricated new shock mounts to accept the set-up. Now the Whitworths have a suppler ride with much greater control and less roly-poly on the corners.
Above: Upper mounts to support twin-shock install were fabricated.
The brakes were all overhauled, new disc rotors front and rear, calipers rebuilt and the same attention to detail on the transmission handbrake. Now some of you are likely wondering what the hell that is? Back in the day when 4WDs had hair on their chests, a trans brake incorporated a drum brake assembly that would act on the rear propeller shaft and hold the vehicle steady. Being up high it avoids the usual perils of a drum brake mounted at wheel level and that’s infiltration of dirt into the linings and shoes worn to bare metal in the blink of an eye.
Under the truck are a total of 230 litres of fuel spread across two alloy tanks, giving the vehicle a range approaching 1,600kms if need be. Despite the dimensions, Rick says the vehicle is economical and sips rather than slurps and puts the economy down to the way the Phaser produces its power now, not having to struggle up inclines and more comfortable battling head winds or overtaking semis.
Above: One of two alloy fuel tanks stored amidships.
Everyone knows the benefits of letting air out of your tyres when straying from the bitumen and having the ability to pump them back up at day’s end. That task is looked after by an Endless Air compressor coupled up to a 25L air tank which in turn supplies air for other tasks like Rick’s air operated door step for passengers stepping up into the bus which is ingenious, or blowing dust out of an air filter.
That’s enough about the mechanicals, what about the appointments for travel I here you say?
Always thinking of redundancy, the water they carry is stored across two tanks, with a total capacity of 180L. The theory is one big tank will drop the lot if holed, better to keep some separate. They are plumbed into a 12V water pump and direct flows up to the sink in the kitchen and also an external outlet for washups outside.
There’s a shower inside too when overlanding away from the caravan parks and the shower rose is a mixer style that can be taken outside for washing the armpits in the au-natural, in the au-natural surroundings, if it takes your fancy.
Above: Top popped in readiness for an overnight stay.
Because the OKA has a hot water service that’s either gas or 240V operated, they’ve got their gas provision supplied by two 9kgs bottles that can be swapped out quickly. Talking of gas, it also feeds two cooking appliances, a Thetford 4-burner stove inside and a slide out 2-burner stove/BBQ outside. Feeding a hungry horde of campers is no stress in this truck. Supplies can be pulled from the giant confines of a Waeco 110L fridge freezer, keeping the beer and grub cold as required.
Above: Two burner gas BBQ does the outdoors cooking.
Powering all this stuff is almost like paying homage to building a modern energy-efficient house. With a total of 405W being supplied by three Kyocera solar panels on the roof and then fed into an MPPT solar controller plus a 260AH lithium battery for storage, it’s going to take a fair while to run the system dry especially since it can be topped up off the alternator too. Thinking of redundancy again, if the starting battery failed the lithium system can be called upon to get them going again. Hell, the 12V supply also powers the electronically controlled pop-up roof and the kick out panel for the bed!
Above: OKA gets some solar to augment the power generation for those moments when its camped up for a few days.
Keeping up with the news is easy too with a 19” 12V Firetail HD LED TV set installed inside that can be pulled down for entertainment, the signal enhanced by a wind-up Winegard antenna. And on that same night you’re glued to the telly and the elements are raging outside and it’s freezing cold, you can rely on the Eberspacher diesel heater to keep the OKA toasty warm inside!
Rick and Sue left no stone unturned with this build and the set-up is now insured for $120K and it looks every bit of that. They’ve been lucky enough to see plenty of Australia together in it and allowed the build to evolve based on their travelling experiences and what worked and what was a dud.
In hindsight Rick commented on the build this way. “I mentioned to you on the phone that the steel bus body conversion was not the best method re weight and effort. To start from scratch with modern RV motorhome panels would be much faster and probably just as strong”.
Above: Camper extraordinaire!
“If I were to do it again, I would choose the latter, but that is not to say that I am unhappy with the way it is. The huge benefit of the bus is all the windows, albeit I cut some of them down. They make it very open, airy, easy to keep cool and give great views”.
“You can also cool it down quickly with the very efficient engine driven bus air conditioner. The bus is well insulated and the diesel heater is great in winter. With everything shut except the hatch it easily keeps the inside snug even when camped in the snow”.
“All makes for very comfy off-road travel”.
2019 Footnote: There’s a bittersweet ending to this story as Rick and Susan never got to internationally overland the OKA as Sue passed away in 2017, just eighteen months short of retirement and the kick off date for the Grand Tour. I’m sure all of the 4WD community would join me in expressing our best wishes to you Rick and thank you for sharing this marvellous vehicle with us. With a bit of planning I reckon you’ll get the kids excited enough to fire up the OKA and do a lap of Oz in the memory of Sue!
Above: Rick and Sue together in boating holiday mode.
2026 Footnote: It is with much sadness that we learnt that Rick passed away on Friday 28th August 2026 after a sudden and short battle with cancer. Hope the two of you are now getting that international touring time under your belts. Condolences to the family.
Four-wheel-drive use in Industry and Government is all about being safe and productive whilst on the job and there are a few simple things you can do to help that cause. The vehicles you are using have a unique set of features to make them more mobile and it makes sense to fully explore the vehicle’s true potential on that fieldtrip you are about to undertake, so here are a couple of ways to get you started.
Above: Toyota’s venerable 79 series utes and wagons are easy to drive when used correctly
Understanding 4WD – Part-Time 4WD (as seen on Hilux and Land Cruiser 79)
Both Hilux and the 79 series Land Cruiser use a basic part-time 4WD system. In its purest definition it is a form of 4WD that can be engaged on any loose surface and should be used ANY TIME you depart a bitumen road. It won’t however sustain use on a hard surface, like bitumen, concrete or paving, as transmission damage can occur.
You have three choices – 2H (two-wheel-drive HIGH range) for bitumen roads and other hard surfaces, 4H (four-wheel-drive HIGH range) for high-speed dirt roads/hard packed clay swales/firmer coastal and desert sands where speeds in excess of 50km/h are sustainable/desirable, 4L (four-wheel-drive LOW range) for low-speed <50km/h steep or boggy terrain where finesse is required over difficult terrain.
In both vehicles’ cases, the engagement of the HIGH range modes can be done on the move and at speeds up to 100km/h (not that I’m encouraging you to do that because 80km/h is a much safer maximum speed on dirt). Moving between 2H>4H>2H is preferably done in motion, no need to stop.
LOW range is a different proposition though. As it is a slow-speed gear set you’ll need to come to a complete halt before you select LOW range and if you are driving an automatic transmission vehicle, select N (neutral) with the main gear selector. Left in D (Drive), R (Reverse), P (Park) will result in a malfunction – typically a warning indicator flashing, an audible alarm or a horrible gnashing of gears sound that can’t be good for the gearbox!
In the case of the Hilux the procedure for 4WD operation is this…
Driving down a bitumen road (at posted speeds) you observe the bitumen terminates and dirt continues
As you approach the surface change, get off the accelerator pedal (this takes load off the transmission and facilitates easier engagement of 4WD) and start the slow-down process (assuming you were doing 100-110km/h)
Roll onto the dirt with the steering wheel in the dead-ahead position (ensures front and rear wheel speeds are synchronised)
Reach across to the 4WD selector (that rotary dial adjacent to the heater/AC controls) and switch it from 2H>4H, and within the space of a car length’s-worth of travel, you’ll see a green 4WD indicator light aglow on the dashboard, telling you that the front differential has been activated and now we have all four wheels driving the vehicle down the road – that’s good!
Automatic or Manual transmission variants behave exactly the same, no need for a clutch dip with the manual either!
Use of 4H on dirt is to be encouraged because 1) you’ve got the facility there and it’s free, so use it, 2) you’ll be safer, 3) along with sharper steering also comes shorter stopping distances and less wear and tear on tyres (the accountants will like that). It is also a widespread Industry practice, especially in Mining, where a dramatic reduction in casualty crashes has occurred since its policy adoption twenty-plus years ago. It should be your policy too!
If the road deteriorates and it now resembles a goat track, full of ruts, boulders, boggy bits or suddenly steep, then STOP!
Dial-up LOW range 4L on the selector (in an automatic with the main gear lever in N (Neutral)), (in a manual with the clutch dipped) and watch the corresponding dashboard symbol confirm success
With LOW range engaged, grab your preferred gear and off you go, albeit at a much slower pace but with a multiplication of torque which is good for dealing with softer surfaces that would ordinarily sap the vehicle’s power and potentially contribute to a bogging
WARNING – use of 4WD on a hard surface (bitumen/concrete/paving) will likely result in a phenomenon called “wind-up”, where conflicting wheel speeds between front and back and left and right, twist the driveline up and bind, putting loads on components that can and do break (the accountants won’t like that).
If you failed to disconnect the 4WD system on those hard surfaces you’ll likely notice after turning a few corners that the vehicle feels like you’ve left the handbrake on, it might skip around a corner or you might hear gear sounds you are unaccustomed to. They are all hallmarks of wind-up.
To relieve it you will benefit in having a loose surface under the wheels and possibly reversing the vehicle as you deselect 4WD. A flashing 4WD light will be telling you that there is still some pent-up tension in the driveline and needing relief
Above: Hilux uses an electronically activated 4WD selector rather than a traditional transfer lever as seen on the LC 79
Above: Hilux 4WD indicator light (green) and LOW range indicator (yellow) as seen on dashboard display
In the case of the Land Cruiser 79 Series the procedure for 4WD operation is this…
Prior to your journey you need to ask yourself whether you will be driving on a dirt road that day? If the answer is yes, get the wheel brace from the tool roll packet and spin the centre hex-nut seen in the front wheel hub assembly from AUTO to LOCK. This fixes the front wheel/hub assembly to the front axle more reliably than the AUTO position and with no likelihood of breakage because the AUTO position is brittle
Driving down a bitumen road (at posted speeds) you observe the bitumen terminates and dirt continues
As you approach the surface change, get off the accelerator pedal (this takes load off the transmission and facilitates easier engagement of 4WD) and start the slow-down process (assuming you were doing 100-110km/h)
Roll onto the dirt with the steering wheel in the dead-ahead position (ensures front and rear wheels speeds are synchronised)
Reach down to the 4WD transfer lever (adjacent to the main gear selector) and pull it back from 2H>4H, and within the space of a car length’s-worth of travel you’ll see a green 4WD indicator light aglow on the dashboard, telling you that the front propellor/driveshaft has been activated and now we have all four wheels driving the vehicle down the road – that’s good!
Being a manual transmission in this vehicle variant, no need for a clutch dip!
Use of 4H on dirt is to be encouraged because 1) you’ve got the facility there and it’s free, so use it, 2) you’ll be safer, 3) along with sharper steering also comes shorter stopping distances and less wear and tear on tyres (the accountants will like that). It is also a widespread Industry practice, especially in Mining, where a dramatic reduction in casualty crashes has occurred since its policy adoption twenty-plus years ago. It should be your policy too!
If the road deteriorates and it now resembles a goat track, full of ruts, boulders, boggy bits or suddenly steep, then STOP!
Select LOW range with the transfer lever by lifting the lever a little before pulling it back. Sometimes that action can be an utter-bastard, especially on new vehicles, so a profanity or two is permitted! No clutch dip required
With LOW range successfully engaged, grab your preferred gear and off you go, albeit at a much slower pace but with a multiplication of torque which is good for dealing with softer surfaces that would ordinarily sap the vehicle’s power and potentially contribute to a bogging
WARNING – use of 4WD on a hard surface (bitumen/concrete/paving) will likely result in a phenomenon called “wind-up” where conflicting wheel speeds between front and back and left and right, twist the driveline up and bind, putting loads on driveline components that can and do break (the accountants won’t like that).
If you failed to disconnect the 4WD system on those hard surfaces you’ll likely notice after turning a few corners that the vehicle feels like you’ve left the handbrake on, it might skip around a corner or you might hear gear sounds you’re unaccustomed to. In the case of the Land Cruiser 79 you might also notice the transfer lever is stuck and won’t budge. They are all hallmarks of wind-up.
To relieve it you will benefit in having a loose surface under the wheels and possibly reversing the vehicle as you deselect 4WD. A 4WD light still aglow will be telling you that there is still some pent-up tension in the driveline and needing relief. Going in reverse will un-wind the transmission and free up the transfer lever for disengagement
Above: LC 79 uses a traditional transfer lever to activate the 4WD system, an analogue application in the digital world!
Above: Introduced in 2018 on the LC 79 series range, these “auto” hubs replaced the previous free-wheeling style of front hub. If you are working in dirt road environment on a daily basis they should be left in the locked position. For long-distance bitumen running you could opt to leave it in the AUTO position
Effective Tyre Management
Now that you are full bottle on 4WD operation, it is time to turn our attention to the second-most thoroughly confused subject when it comes to 4WD use and that is tyres and tyre pressure!
Motor vehicle manufacturers know that around 90% of their 4WD vehicle sales go to owners who have no intention of going bush, they are stuck in the city, so most new vehicle sales come with Passenger (P) car tyres fitted as standard. These are a compromise, trying to perform too many purposes and excelling at none – offer a comfortable ride around town, have an adequate ability on perfect or less perfect surfaces and carry a load with plenty of resilience. They fail on most counts.
Above: A passenger-car pattern like this doesn’t afford much grip on too many surfaces except maybe the bitumen
If you are reading this, it is because you are operating a 4WD in a commercial environment and therefore you’ll need something better.
In a nutshell, that will be a Light Truck (LT) tyre and running an all-terrain (A/T) tread face, the great all-rounder!
Above: Toyo’s Open Country AT3 (left) and AT2 (right) are excellent alternatives to the passenger car dross Toyota supply as OEM factory fitment. The Toyo’s in Light Truck (LT) construction, are excellent all-rounders, not noisy, nor uncomfortable, just proper get-the-work-done tyres for most conditions
With that selection will come these significant benefits – a deeper 13mm tread depth (Vs 9mm), a tougher tyre carcass, better able to carry a load and withstand punctures and a tyre that steers and stops on all surfaces better. The accountants will also like that they last longer, but only if you get involved in a pressure regime that can make you failure-proof.
Selecting that A/T tyre also needs a little scrutiny, in particular examining the data stamped on the sidewall.
A standard Hilux tyre will say something like this…
265/65R17 112S – 265mm wide, 65 aspect-ratio (fancy way of saying 65% of the tread width amounts to the sidewall height), R = Radial construction, 17 = 17” diameter wheel, and the important number 112 = 1,120kgs carrying capacity stated as the Load Index (LI), whilst S = 180km/h the Speed Rating
What you really need is this…
LT265/65R17 120R – same initial information with the exception of the LT reference = 13mm tread depth and heavier construction, but the bigger news is the 120 load-index = 1,400kgs, whilst R = 170km/h
Above: Stock OEM supplied Dunlop Grandtreks on Toyota Hilux are an appalling choice for a commercial vehicle. What might just work in the city is hopeless in the bush and needs replacing. Passenger (P) construction and a low 112 Load Index (LI) aren’t conducive to a life spent on gravel!
Above: It is the detail that matters. This Toyo Open Country AT2 ticks all the boxes – Light Truck (LT) and with a massive 120 = 1,400kgs Load Index (LI)
Your Land Cruiser 79 series might quote this…
265/70R16 115R – 265mm wide, taller 70 sidewall and fitted to a 16” wheel, 115 = 1,215kgs
What you will want is this…
LT265/75R16 123R – same initial information with the exception of the LT reference = 13mm tread depth and heavier construction, the taller 75 sidewall, but the bigger news is the 123 load-index = 1,550kgs
Above: This has been my favourite 4WD tyre size forever on a 16″ wheel and largely due to its incredible 123 Load Index (LI) = 1,550kgs of carrying capacity. Very tough!
Using a tyre with a minimum 120 load index is the threshold I know that works in ensuring a long-life with minimum pain and we call it the 120 Rule. Demand it of your tyre vendor so you get a 120 load-index (or greater) and in LT construction. It will save you a lot of pain and again the accountants will love it, because you won’t suffer tyre failures ever again (with careful pressure management)!
Now that you have the right rubber, let us consider the pressures.
Toyota have thought long and hard about that advice and they offer it up via a decal affixed to the vehicle by the driver’s door and called the Tyre Placard.
Now, whilst the placard was conceived with a mindset of using the standard rubber that came with the vehicle, it still has relevance, even with an alternative LT A/T fitment.
You see, the whole tyre pressure equation revolves around three factors – pressure/load/speed.
As you add weight to a vehicle, the pressures need to go up to support the increased weight
If you travel at high speed on the highway, you’ll need increased pressure (per the placard recommendation) to regulate the temperature of the tyre
Remove load (when empty) or slow down (when off-road), you don’t need as much air
The placard on a Hilux and running 17” wheels offer a couple of pressure settings, which, from my experience work (provided you are not going ridiculously oversized), whether you are running P or LT tyres and depending on your weight.
Above: Toyota Hilux placard
When empty (unladen with 2 occupants and 400kgs of luggage or less) both front and rear need only 200kPa = 29psi. On my vehicles I round that up to an even 210kPa = 30psi, it is easier to remember and in their local use and carrying little gear 210kPa/30psi gets me a tyre that is comfortable and lasts for an extraordinary life. I expect anywhere between 80-90,000kms travelled and still with tread left on the tyre before I replace them.
When heavy and approaching the vehicle’s GVM (Gross Vehicle Mass) the placard pressure bumps a bit, 230kPa = 33psi for the front and 250kPa = 36psi for the rears. Even with a heavy load, those pressures will preserve a modicum of comfort and steer and stop appropriately.
There will likely be co-workers and others who are dissenters on this point and will recommend to you starting pressures of 280kPa/40psi or more as being more relevant. What they fail to recognise is that those pressures are designed to carry far greater loads than Hilux will ever impose on its axle pairings and are unecessary, gifting you a much rougher ride, more punctures and prematurely worn out tyres. Not desirable!
The placard on the Land Cruiser 79 series and running the 16” wheel variant (265/70R16 115R) from earlier in this discussion offers this info from the placard and again it’s right.
Above: Land Cruiser 79 series placard states three tyre sizes and for our discussion we’ve selected the 265 variant
When empty, 250kPa = 36psi front and rear works and when fully laden and approaching GVM, 350kPa = 51psi for the rears only, is what is needed.
These pressures for Hilux and Land Cruiser 79 are what are required when on the bitumen and using the stated sizes and at the assumed loads the vehicles were designed for, further refinement is required for dirt roads and later off-road. The danger with overinflation, and I see this all the time, are tyres worn out before their time, greater puncture susceptibility, nervous steering, a rough ride and extended braking distances, none of which is desirable.
Above: When off-road, a significant advantage can be had by tyre pressure reduction, in an environment like this reducing to around 140kPa/20psi will provide greater flotation, grip and puncture prevention at lower speeds
The off-road pressures are a whole other chapter, so we’ll leave that alone for now, but what I will share with you is this super-useful setting if you are going to be driving on a dirt road all day. We call it the 20% Ruleand meaning, when you leave the bitumen behind and intend clocking up some kays on the dirt that day, drop your pressures from the placarded levels by 20% and slow down by 20%, no faster than 80km/h.
Above: Swapping a stock tyre for an alternative A/T or all-terrain makes driving in all weathers much easier!
Reducing the pressures introduces some flexibility in the tyres and they then can cope with rock impacts and likely survive the big hits, especially since you slowed down as well. I intensely dislike having to do field changes of tyres through negligent failure and luckily for me, I haven’t lost a tyre in the bush or on a trip in 25 years, thanks largely to this pressure regime. You too can make yourself puncture-proof with the right tyres and the right pressure application!
Not only is Coffin Bay township and its near surrounds an extraordinarily beautiful place to visit but the adjacent National Park is a true gem. If you’re lucky enough to own a 4WD you’ll be able to get really close to nature and sample one of the best coastal experiences you’ll find anywhere in the country if not the world. The trails that criss-cross the park offer some challenges for different reasons at different times of the year and make a stay in the park for a day or a week a whole lot of fun.
The Coffin Bay Township is 45 kilometres west of Port Lincoln. Port Lincoln is a well-serviced town that supports its fishing and agriculture industries with excellent engineering and transport infrastructure and is handy enough to race back to for spares and repairs from Coffin Bay if needed.
Coffin Bay has everything a holiday-maker might want for a stay, from a caravan park with powered and unpowered sites and cabins, to traditional motel style accommodation thanks to Long Beach Holiday Apartments and plenty of holiday rental homes accessed via Coffin Bay Holiday Homes. There are plenty of comfy places to stay in or you can camp in the National Park. Both the new IGA Supermarket that used to be known as the General Store and the Beachcomber have fuel, fast food and of course, oysters.
To get to the National Park from Coffin central simply take the Esplanade all the way around following the Oyster Walk to the park entry via Long Beach Road or follow the signs past the Coffin Bay Hotel.
The bitumen road leads initially to the park entry point where a user-pays system has now been replaced with an on-line system. Not sure that the new system is the better experience because I’m a first-come, first-served kinda guy. But that’s what the minders in Government want us to do now, so you can find a campsite via this link.
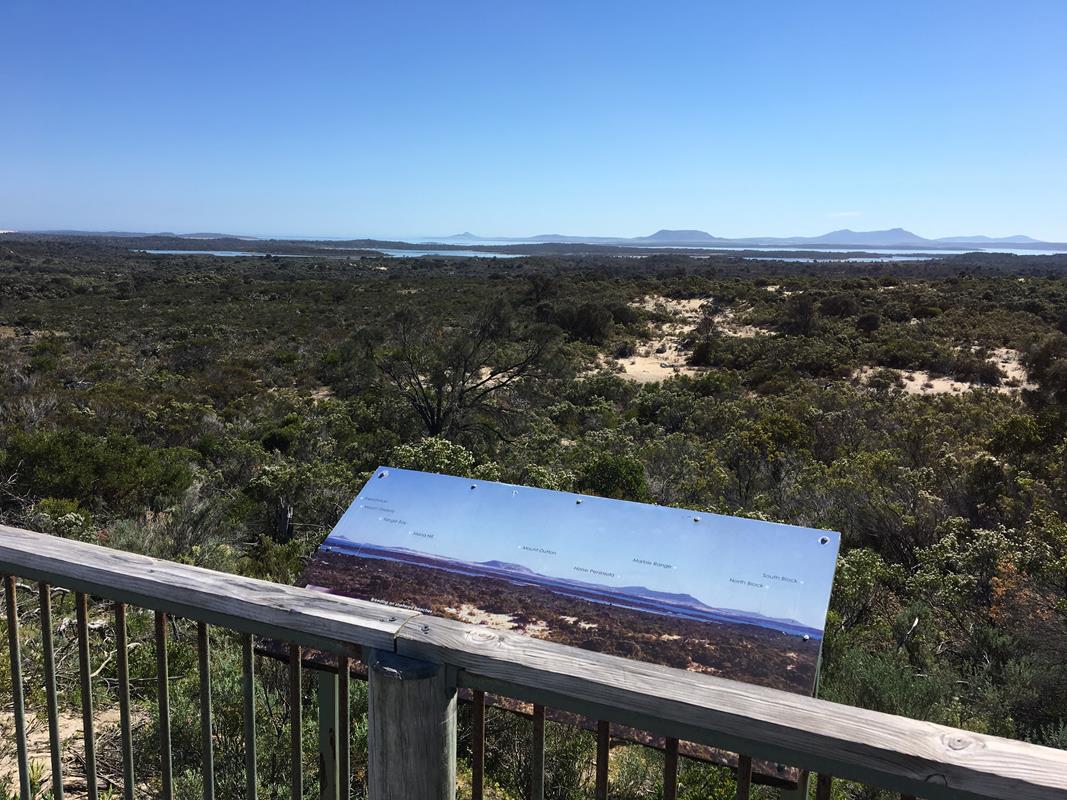
Once you’ve paid your fee follow the blacktop as it meanders through the dunes, a beautiful drive that summits at Templetonia Lookout on the RHS of the road (Templetonia is a native plant in the district), a spot well-worth getting out of the car for a stretch of the legs as the view of the bay and the Marble Range, Mount Dutton and Mount Greenly is superb. Don’t be surprised if you encounter a family of emus along the way as they are a regular feature of the local roads.
If you were paying attention you would have also seen a sign on the left pointing to Gunyah Beach. The track there is 4WD only, the initial 2 or so kilometres is firm, a gravel/dirt/rock surface is easyish going before a sign warns of the sands ahead for a similar distance to the beach. Airing down is essential and a 50% dump will be required if not more, because Gunyah has a habit of catching people out all the time and is totally unsuited to AWD vehicles with poor clearance and no LOW range.
The drive through the dunes is marked and stunning, dropping down to the beach from the hills above it in one giant panorama. Once at the beach you’ve got a couple of options, a turn to the right won’t take you too far towards Almonta Beach before you run out of driveable beach.
A turn to the left will take you along a longer section of coast that rewards fisher-folk with great schools of salmon, mulloway and mullet and of course bigger fish with big bitey mouths. Be warned, it’s not a good beach to go swimming on unless it’s a day with a small swell and little wind. Probably better you just admire it rather than take a dunk.
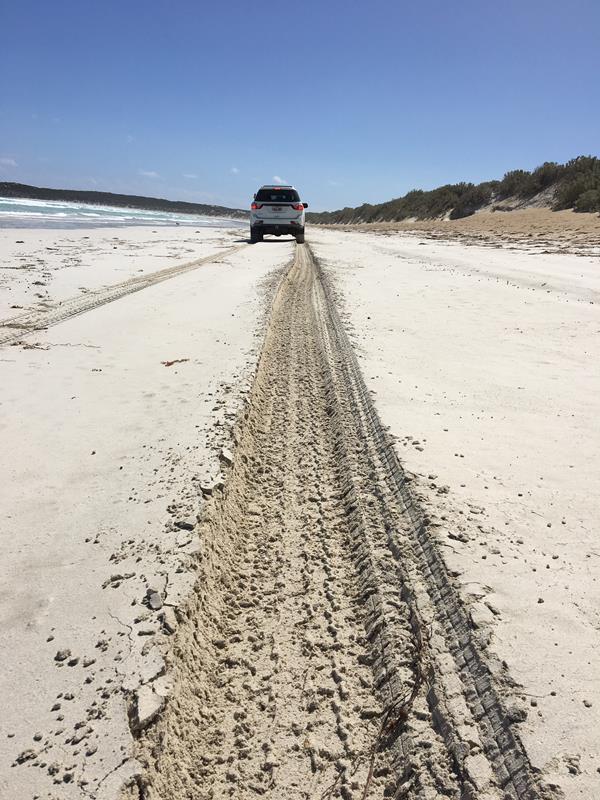
Back in the vehicle you’ll soon discover the sands are SOFT and if you’re used to driving a beach down near the water’s edge that’s firm… well you won’t find it here. Visit knowing you will likely get bogged. Oh and help’s a long time coming. Independent travel thinking is definitely recommended. Pack your MaxTrax or TREDPros and a shovel.
Depending on what time of the year you’re visiting will determine what approach to take. If it’s summer and dry you’ll likely be in LOW range and using all the gears. If you have a vehicle with electronics turn off both stability control and traction control because they will seriously mess with your head applying autonomous braking applications when you don’t want them. On this trail momentum is definitely King!
Back at the junction near Templetonia and after a session on Gunyah if you kept going west on the bitumen you would have bumped into a T-junction, left to Point Avoid (which is a beautiful bitumen coastal drive taking in Point Avoid, Golden Island and Almonta Beach) or right to Yangie Bay.
From the lookout overlooking Almonta Beach I was once rewarded on a glorious autumn day seeing a pod of around 40 dolphins lazily catching waves and rounding up fish. I’ll remember that moment until the day I die, but hey that’s a pretty standard experience in this part of the world.
The 4WD interest starts again in earnest via Yangie Bay where the first official formal campsite is located, recently renovated and complete with stunning views and facilities limited to long-drop toilets, some shelter pavilions and walks around the bay’s shoreline. This is where the caravan set usually park up with their rigs. If that is your thing it makes a perfectly good step-off point for 4WD access to the National Park-proper.
It’s also now that you’ll be on the dirt and it’s time for two things – again some serious tyre pressure reduction and some 4WD engagement, because just around the next corner starts the sand. Put your thinking caps on right now.
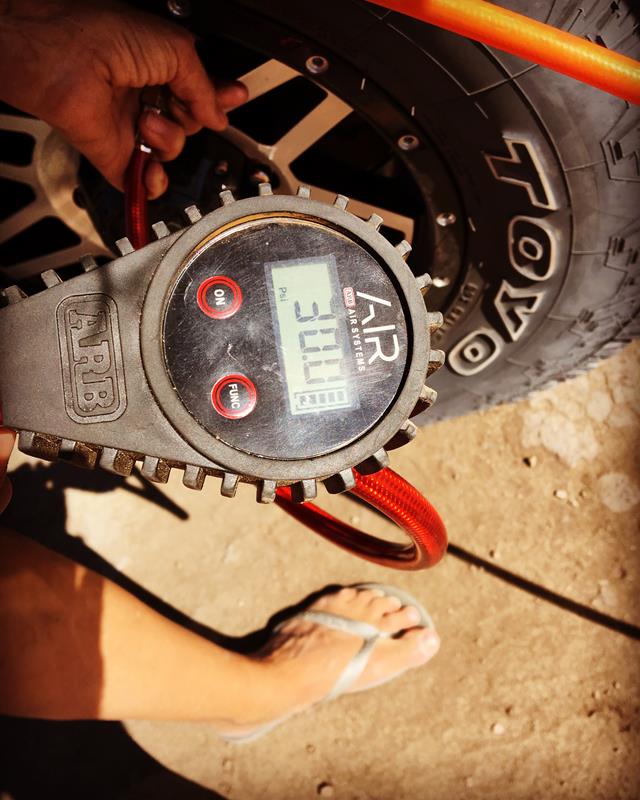
In summer the sand here is SOFT (seems to be a common theme). In the first five hundred metres you’ll be bogged if you haven’t gone straight down to 15psi/105kPa, yep 15 psi (if you’re running silly 18″ wheels you might want to keep a couple more psi up your sleeve (18-20psi) because lower pressures might result in a tyre becoming uncoupled from the wheel, it’s all about sidewall height and flex and 18″ are generally crap with a shorter footprint and less bead retention). Now don’t stress about that pressure because it’ll achieve a bunch of things. One is it might preserve a marriage and two it’ll save you looking like a loser because the trail gets busy and that half hour you spend pfaffing around trying to get unstuck will be holding other people up. You don’t need that stress. The other plusses are you’ll preserve the track and also your tyres if you nudge a piece of sharp limestone further into the park.
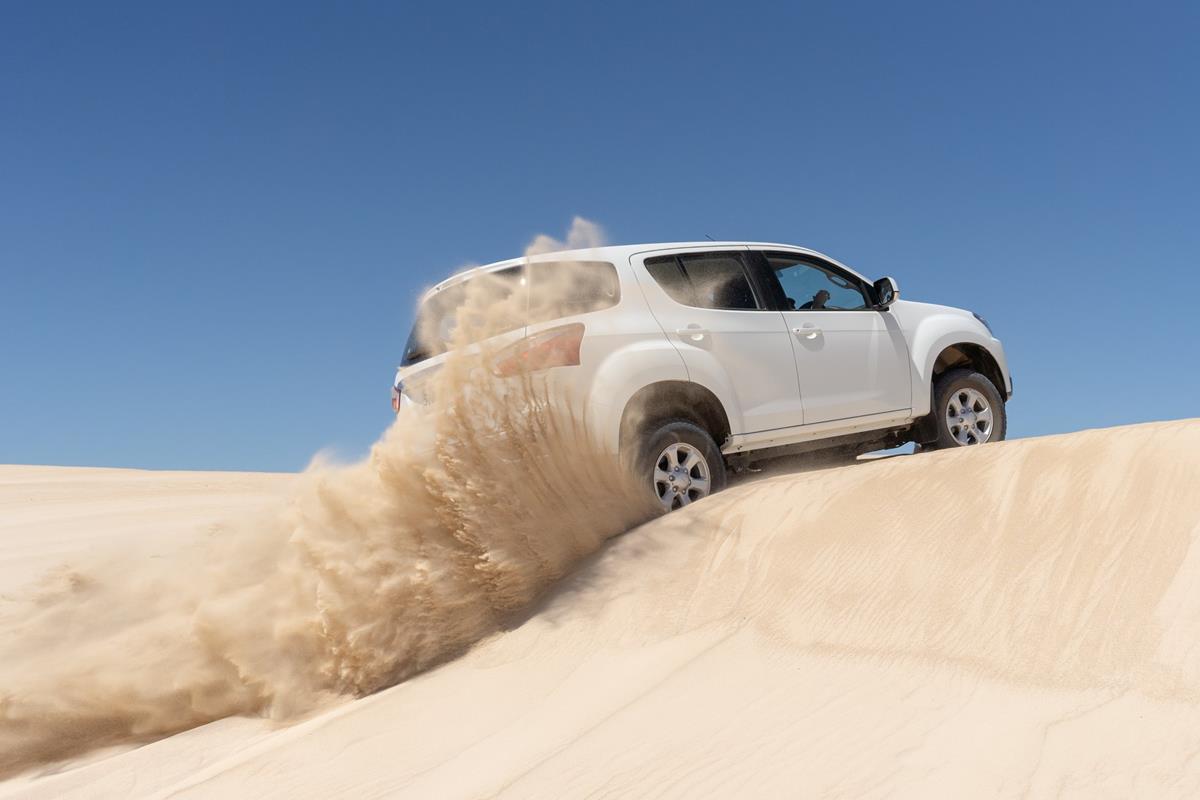
I’m also a great believer in using LOW range before time. This first tricky section en-route to Lake Jessie and beyond demands LOW range, you’ll multiply the torque output of your vehicle which equals more grunt and more gears to choose from. I’ve towed a fully laden Kimberley Kamper through here across a couple of summers visits and powered through in our Isuzu D-MAX or the MU-X using 2nd, 3rd and 4th gears in LOW when others were busy getting themselves bogged, trying to slug it out in HIGH. If you’re driving an automatic pull it out of DRIVE and stir the gears manually. You’ll exercise more control by keeping that engine busy whilst you plough through the soft sand. Oh and don’t forget to turn off both traction control (TRC) and vehicle stability control (VSC) (VSC will be disabled automatically when you select LOW range).
Away from the edge of the bay and heading slightly inland for a while the grip will be restored as you’ll be running over limestone shelves amongst the vegetation. The track is still only one vehicle width so you might have to yield to on-coming traffic from time to time by ducking into a slot at trackside. You might elect to return to HIGH range for a while as you sail towards Lake Damascus.
If you’re thinking of camping in the park, Black Springs rates highly. A row of around a dozen campsites are perched on a low brow of limestone covered in a Mallee-eucalypt woodland and nestled nicely out of the wind, with one of the best views in the park looking east across the bay to the sentinels of Marble Range, Mt Dutton and Mt Greenly. The only facilities are a pair of long-drops.
If you are a walker the Black Rocks hike is a good thing to do. Whilst the full hike is a 4 hour return journey of 12 kilometres all the way to Black Rocks, I’ve done the shorter walk of around 2.5 hours return to where the track bumps into the cliffs at Avoid Bay. With a Sea Eagle eyrie perched on an obelisk of rock out in front, the wave-swept bay of Sensation Beach to the west and craggy cliffs and pounding surf stretching south-east to Black Rocks and Point Avoid make for a pretty awesome reward for a bit of relatively easy walking.
Meanwhile back on the 4WD trail the track swings north hugging the coast in places and past Point Longnose and running in and out of the dunes before hitting the beach proper at Seven Mile Beach. OMG this is a nice part of the world. The observant amongst you will notice right through this section a grove of Quandong trees and in spring they’re ripe for the picking, just ask the emus!
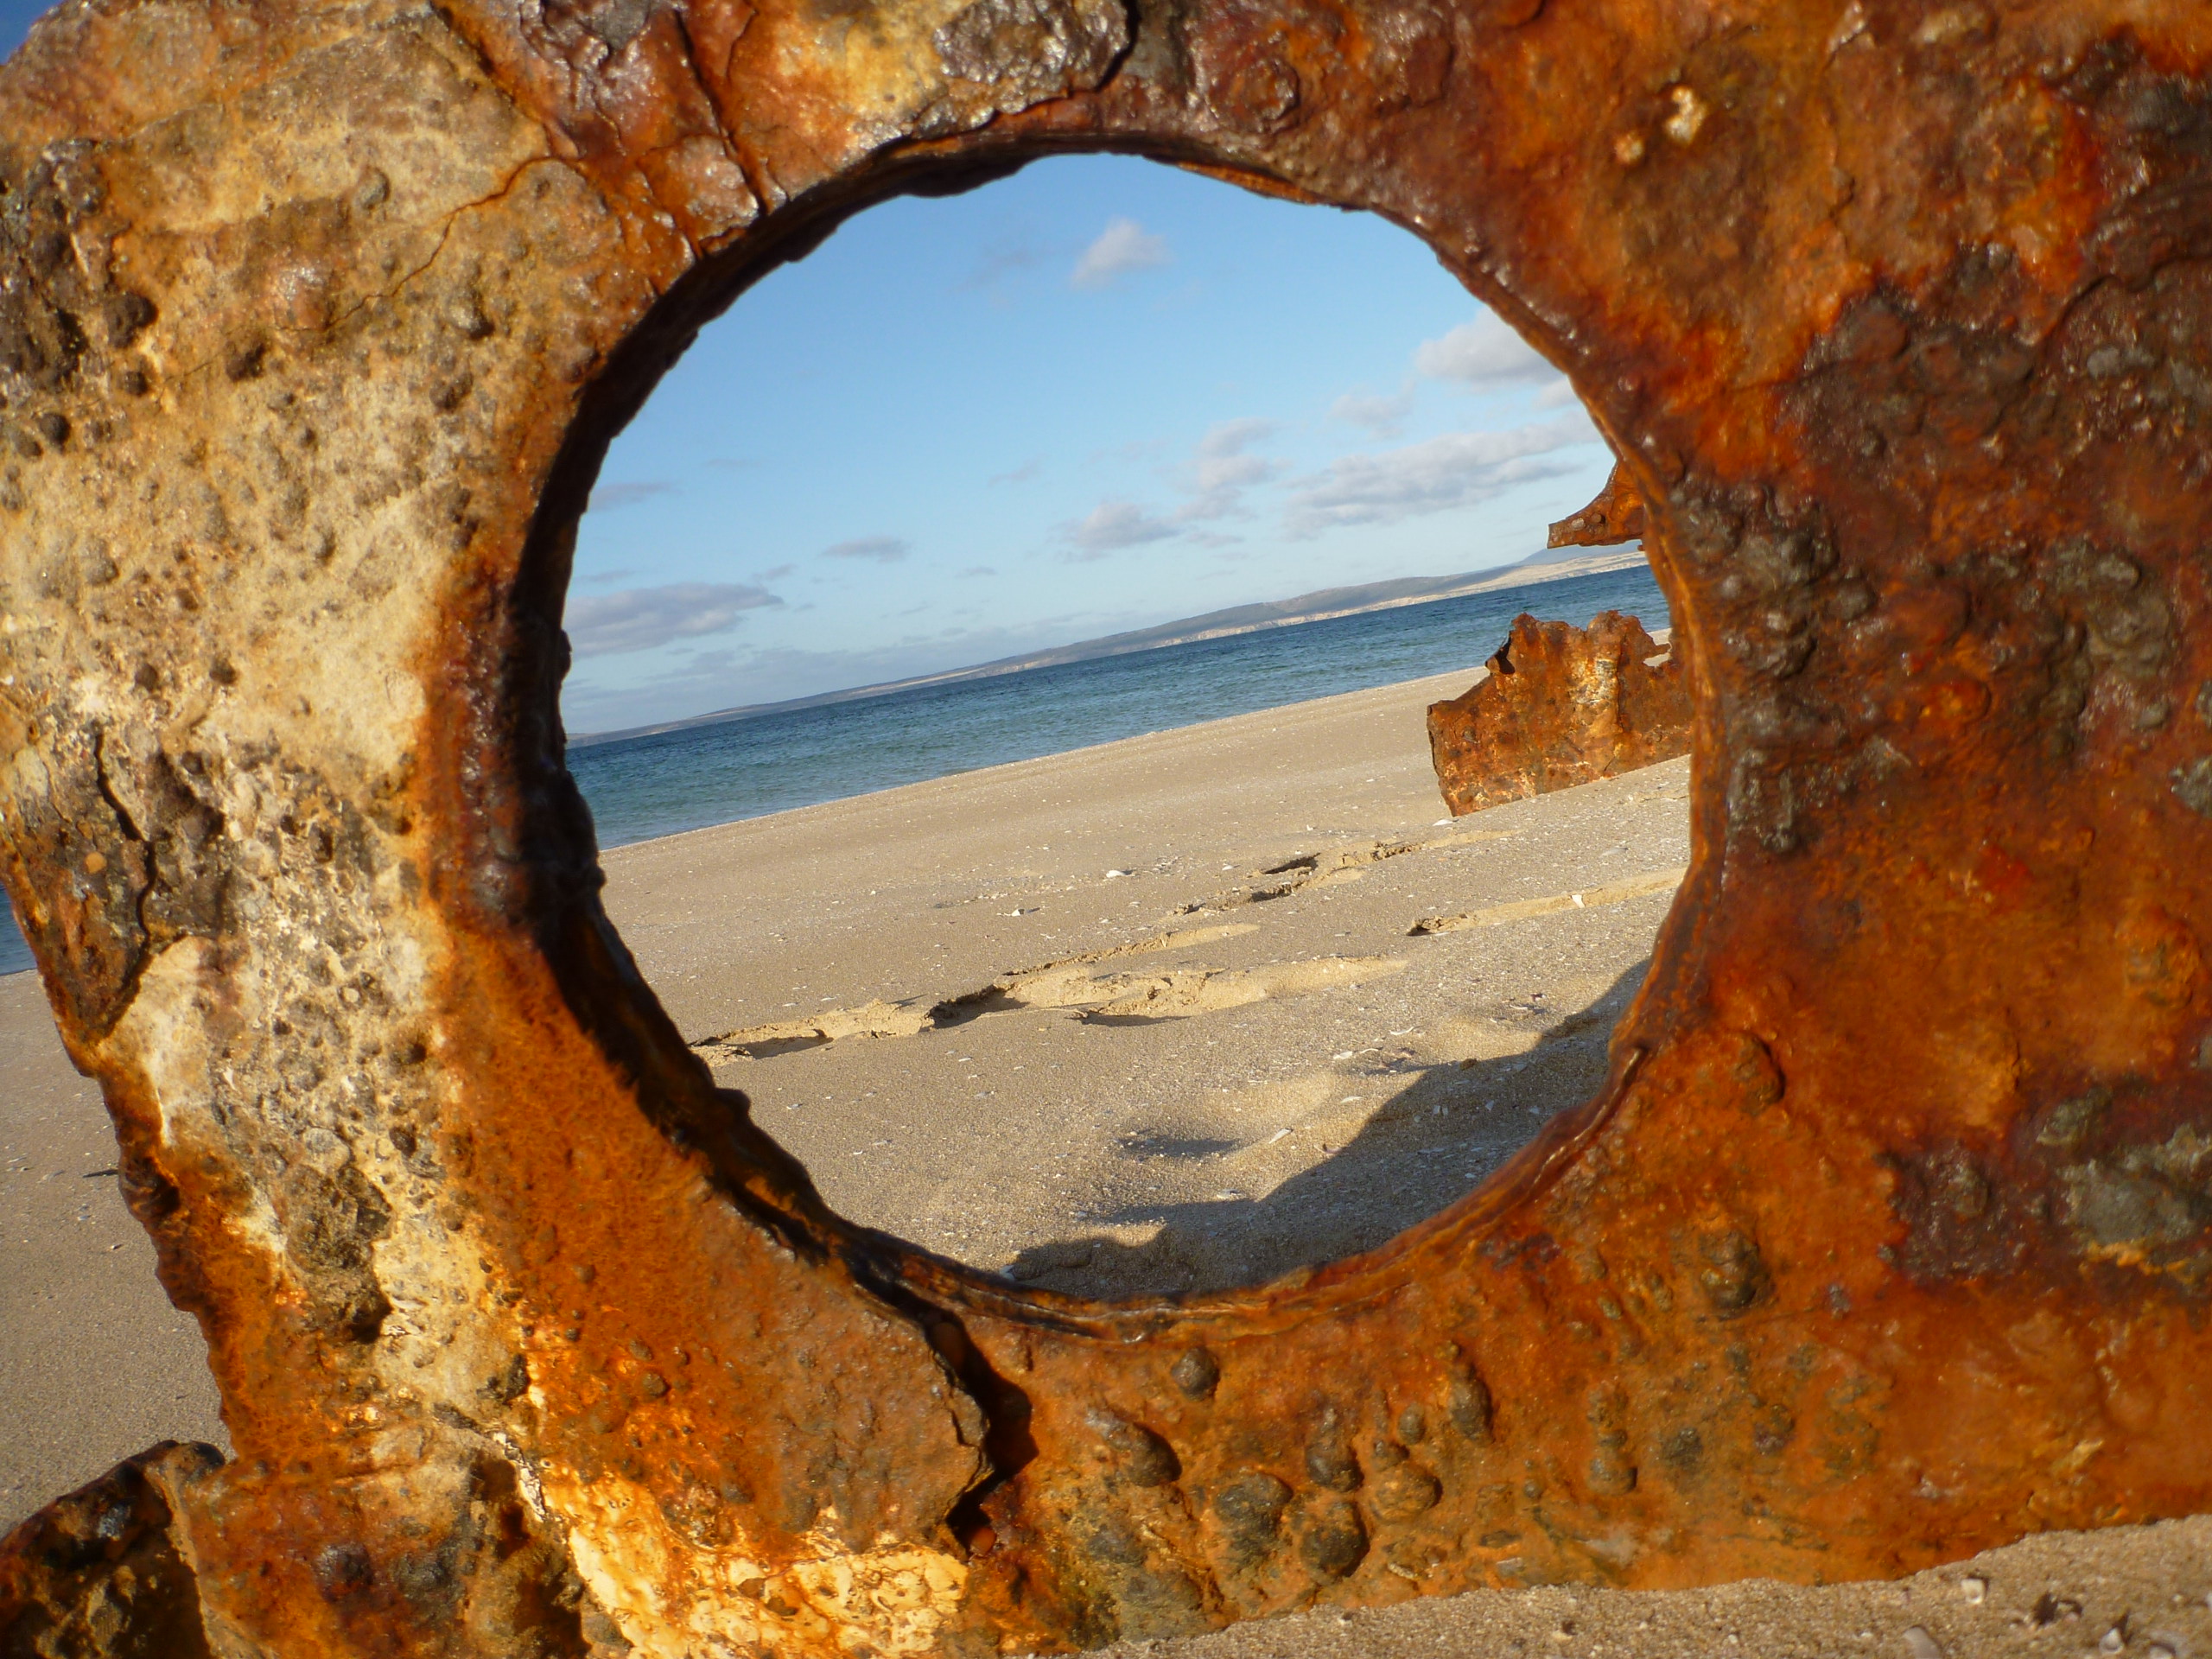
Where the track merges with the beach there’s an exclusion zone to your right (looking east), you’ll know it because there’s the rusting hull of a fishing vessel slowing rotting away into the sand and clearly visible. Turning left and onto the beach stretches the “Seven Miles”, a broad curving part of the bay adjacent to the Thorny Passage Marine Park.
In summer with the milder tides you shouldn’t have any dramas along here as there’s plenty of room between the HIGH and LOW watermarks, but winter and spring needs some caution exercised particularly around a full moon on a high tide, as you might find there’s no beach to run on and the top track is submerged. Thankfully the waters here don’t have the full forces of the sea crashing into them, so wave carnage won’t be a concern if you got bogged. The tyre pressure reduction you did earlier in the day will pay dividends once more, as you should sail through this section with no dramas.
A couple of kilometres into the Seven Mile Beach run and you’ll be alongside the towering sand hill that topples into the bay and it’s worth getting out of the car and walking to the summit. It’s a great escape for the kids and set them a challenge with a race to the top. The reward is a panorama of Coffin Bay, Mt Dutton, Mt Greenly, Point Longnose and up to Point Sir Isaac.
The track ducks back into the hinterland with an option to cross the peninsula to Sensation Beach (named after a fishing boat called the Sensation that ran ashore here in a storm) and some surf fishing or if you wanted to park the car up here overnight (or probably smarter find a campsite at Morgan’s Landing) there’s the Whidbey Wilderness Zone hikes, one called Boarding House Bay and the other simply Whidbey. Both are lengthy (suggested 8 hour return for 24 kilometres distance) and probably deserve an overnight campout with your pup tent.
Back in the middle of the peninsula is where the pastoral activity used to be and the remnant fencing and buildings crumbling into the earth are all that remain of, of all things, a horse stud known as “The Coffin Bay Run”.
A pommy army Captain named Hawson imported 60 Timor ponies to establish a hot temperature breed for toil in the Aussie bush. Having selected a lease on the Coffin Bay Peninsula in 1847 he established a farm and set about building the stud’s stocks up with a “free range” farming style of letting the animals roam and graze pretty much where they pleased. After 10 years of toil he sold the lease and the farm’s stocks to a bloke named Mortlock (now there’s a SA founding name if ever I did hear one) who decided to add some height to the ponies with a bit of mixed breeding. The lease changed hands a couple of times and in 1932 the Morgan family gave it a crack.
The fortunes of raring horses were in decline with the advent of mechanisation and eventually the enterprise became unprofitable, the lease relinquished and the National Park became a reality, leaving a wild mob of horses roaming around.
A mob of feral horses loose in a National Park is contrary to conservation so they had to move on, a cull avoided when a local group wanting to preserve the heritage of the horses took possession of the animals and they now reside on private land over near Wangary and Kellidie Bay.
I can remember back in 1986 seeing the horses grazing, pretty flighty when approached, a really bizarre sight. With the grazing removed gradually the vegetation is returning, likely a good outcome.
Continuing with the horsey-theme, nearby Morgan’s Landing (named after the last lessee) is another fine campsite that looks east towards Farm Beach. Set in the low dunes beyond Seven Mile Beach with Mallee-woodland offering some welcome shade and great views of the bay. Again you’ll find some long drop toilets there. Morgan’s can also be accessed along the beach from Seven Mile Beach or via the inland track.
Heading north to the tip of the peninsula the track goes inland once more past Phantom Cove (isn’t that a great name) and Point Burgess, en-route to The Pool, the last of the remote campsites in the park. It’s a lot like Morgan’s, a view across the bay this time toward Gallipoli Beach.
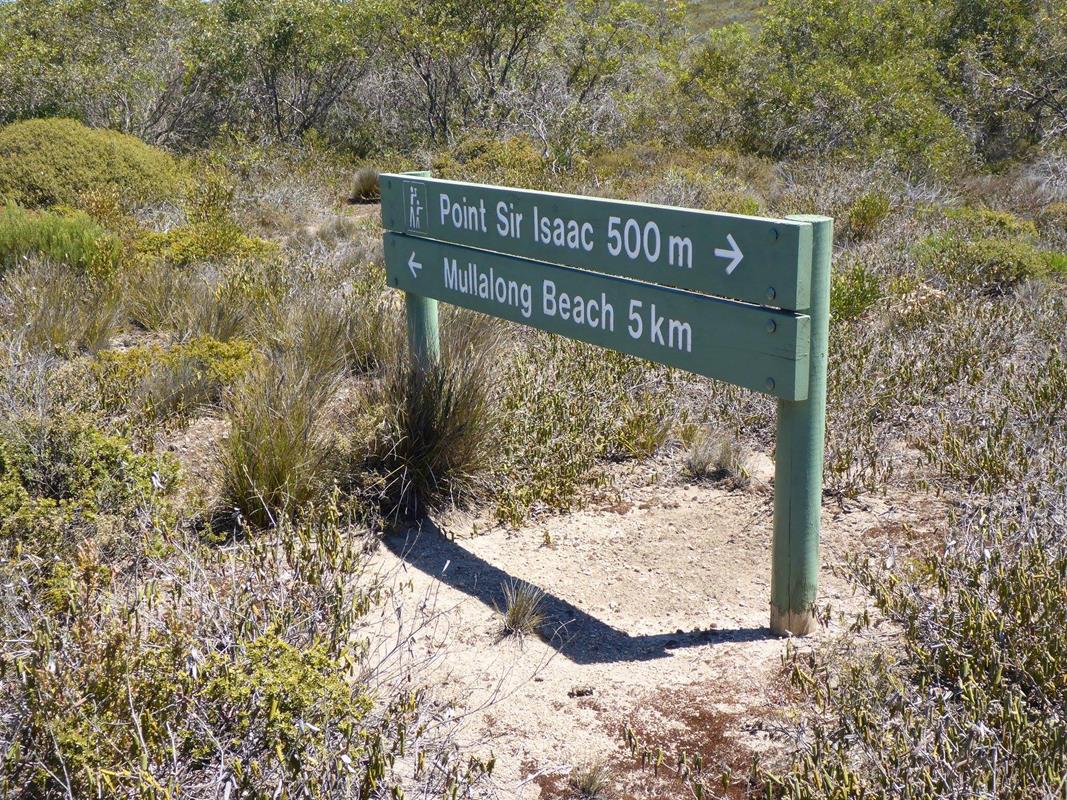
Just beyond The Pool is Point Sir Isaac a little spur that defines Seasick Bay’s eastern-most projection, at the other end are the granites that buffer against the wild seas of the Bight and the Southern Ocean. Seasick Bay’s a pretty place too, a classic lunette shape that cops a little swell as it wraps around the corner. We caught a nice flathead there once upon a time and must have another go sometime.
The 4WD trail continues from the western point of Seasick a short distance south-west in amongst the granite rocks where on another visit I witnessed a family of emus emerging from the nearby scrub and walk to the water’s edge and take a sip from the Southern Ocean… you see some bizarre stuff here.
For the surfers amongst you there’s Mullalong Beach a wave that breaks over a reef around a 100m out that’ll work when there’s any easterly (offshore) breeze. Not for inexperienced surfers this break is difficult to access, as the beach is at the base of a steep limestone hill and coupled to the paddle out you’ll want to be well-practised before you take it on.
If you have a mobile phone, coverage with Telstra is OK in a lot of the park with the exception of the very bottom end and in the hollows between the bigger dunes where it can be a little patchy. Do your homework, do your preparation and let your tyres down and be ready to engage LOW range when things get technical and you should be OK.
So to sum up a Coffin Bay 4WD experience, this is a place that rates highly in my book. It’s so good I bought a holiday rental house in the town a couple of years ago, because I want to visit and soak up the wonders on a regular basis. I love the colour, the lazy days, the beaches, the dining, the local people, the 4WDing opportunities and of course the oysters. You’ll likely never see waters so vivid, sunsets so colourful, a landscape still largely unaffected by us humans, as that you’ll find at the bottom of Eyre Peninsula.
Follow this link to the local tourism association’s info page
Photos thanks to Iain Curry, Mark Harman, Isuzu I-Venture Club, David & Rose Wilson, Adventure 4WD
Just received a cracker story from our Northern Territory correspondent Tighe McIntyre. I’ve known Tighe for a long time and apart from his affliction with Land Rovers he’s an awesome bloke (yeah I know I’ve gone in to bat for Rovers too in the past)!
Read on…
Hi David,
Thought that I would share a great story with you. opera mini app
Two good mates were driving along a road just outside Kalumburu (WA) having a good old yarn, when the passenger dropped his cigarette on the floor on the passenger side of the Toyota Prado. The driver was most upset with him and tried to help him find the cigarette while doing about 70km/h.
As you would expect, the car drifted off the road and the driver has done the big over-correct and ended up rolling the vehicle 3 times.
The passenger was not wearing a seat belt and was thrown out of the Toyota and landed on the ground, with little more than gravel rash to both arms (simply amazing, he should be dead).
The Toyota landed back on its feet. The driver jumped out of the car, most concerned that he had killed his mate. He ran up to his mate who was was still lying on the ground, wondering what the hell had just happened.
The passenger jumped to his feet and started a bit of a fight with fists swinging and all, as his buddy could of killed the two of them. After a few minutes they came to their senses and shook hands and made up. After brushing the dust off each and talking about how lucky they were to be alive, they went back and jumped in the Toyota.
To the owner’s amazement, it started straight up and drove off (after they kicked the remains of the windscreen out)! The photos attached are the Toyota after 5 weeks of driving around town post-accident. Apparently the bugs are a bit of a problem, but it still goes and drives like the day before the accident. They were the funniest, toughest blokes!!!
Pic Above: On the way to Seaham in NSW you can expect this every now and again
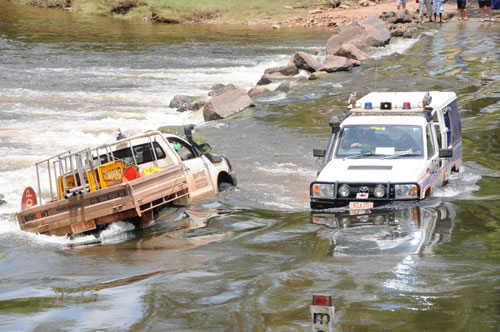
In recent weeks I’ve been doing a lot of training in watery environments and noting the bigger storm events that have charged across SE Australia with dangerous results. It got me thinking how safe are fording depths suggested by vehicle manufacturers??? tinder without facebook
Every year a dozen Australians die trying to cross a flooded stream with their 4WDs, an action that might seem possible but is extremely foolhardy. I too have been fueled with my own importance and solid belief in my invincible 4WD and remember a time in the Victorian Alps making a crossing in half-metre deep water, that was travelling reasonably quickly. What surprised me was how sketchy the balance of the vehicle and the steering became as soon as we were fully immersed, because it was obvious there were moments when we were near floating.
Now it seems if the stream had been marginally deeper I would have been in seriously deep s..t (or water???)
A study commissioned recently by the NSW Department of Environment and undertaken by the University of NSW, has shown just how little water it takes to unsettle a vehicle.
Using a pretty typical 4WD (in the form of a GU Nissan Patrol and weighing in at around 2,500kgs) and dunking it in a bath in a laboratory, they’ve drawn some interesting facts. Filled to barely 450mm depth the Patrol started to lose its grip on the world and could be moved via the force of water applied to its side without too much trouble. At 950mm it was afloat! Have a look at this time-lapse sequence showing the Patrol in the bathhttps://www.youtube.com/watch?v=br1jeKjfOVI
That’s pretty scary data as plenty of 4WD owners I know wouldn’t even blink at the prospects of taking on bonnet-high water with or without some preparation.
In the classroom we believe that axle-high depths are usually do-able on a known crossing with a firm base and a gentle-to-no flow across the causeway. We’ve even traversed streams that are wheel height (around 750mm) with some prior planning and a blind installed across the front of the vehicle to restrict water ingress into the engine bay. But deeper… I don’t know, there’s too many variables?
We currently run an Isuzu DMAX and upon reading the owners manual you’ll discover that there’s no mention of a safe fording depth, just a reference to engine damage if you’re not careful. But what does a safe fording depth really mean?
Well there’s a bunch of breathers that come off the differentials, the gearbox and the transfer case and vent to the outside world at a higher point in the chassis (get under your fourbie and look on the top of the differential housings and you’ll see a valve and a tube that’s clamped to it). These gear housings get hot as they do their work and the resultant pressure that builds up inside has to expand somewhere, so the valve provides that pressure relief.The hot air rises up the hose and escapes at a level where water intrusion isn’t likely.
Pic Above: ARB make diff breather kits for all makes and models of 4WD if you’re looking to get the tallest point into your vehicle
A breather with no extension means a dunking in water will be rewarded with a contaminated gear assembly and early corrosion if not attended to immediately. Some makers send their vehicles out this way and that’s why their safe fording depths are quoted on the low side, perhaps as little as 300mm or so. With an elevated entry point, a breather with hose attached offers deeper fording capability, but not at the expense of those precious gear clusters. However an overly ambitious quoted fording depth might enhance the perceived capability, dare I say manliness of the vehicle, to a point where it’s patently unsafe.
Another consideration is where the vehicle’s engine breathes from? An internal combustion engine (diesel or petrol) needs fuel and air to work. If you open the bonnet on your vehicle and locate the air filter box you’ll see a connection to the inner wheel-arch. That tells us that the engine draws its air from the void found in the space between the plastic inner-liner of the wheel-arch and the metal mudguard assembly. Fed by air forced in around the radiator grille, this supply remains relatively dust-free, drawn past the air filter and ultimately into the engine.If the depth however is up around the top of the guard you might be asking for trouble!
Some owners opt to put an aftermarket snorkel on their vehicles, a plastic duct with an opening around the top of the windscreen that follows down the front window pillar and along the mudguard, then plumbed directly into the airbox. You could be lulled into thinking with one of these you’ve got all bases covered, and a plunge into a stream might then reward you with aquarium views if you dared go in deep enough! Nope, I didn’t think so!
So if you were a Ford Ranger owner and buoyed by Ford’s claim of an 800mm fording depth what might that do for you? Well if the 4WD Gods were looking after you and you made the perfect entry and exit from a pond of still water, you might be thinking you’re pretty clever. But if the stream was flowing and you weren’t paying enough attention to the depth you might find your Ranger becomes a canoe and floats downstream with an unknown fate.
Emergency services regularly warn of the perils of crossing such streams. Perhaps it’s about time we took heed of their advice?
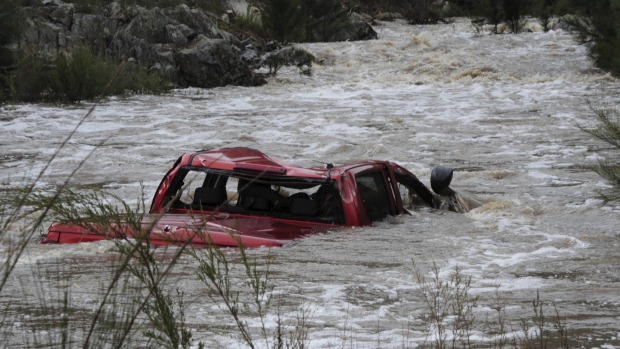
Pic Above: Sadly a chap lost his life in this one in the ACT and I doubt his snorkel helped at all. If it’s fast-flowing don’t attempt it, it might be the last thing you do!
Pic Above: Added little challenge here is the prospect of bitey things in the water!
Pic Above: Another peril of water crossings is the fragility of number plates! Look closely and you’ll see what I mean.